In this guide, we'll cover:
- Creating Donor Accounts
- Completing the Donor Profile
- Custom Fields
- Stage Settings
- Documents
- User Activity
Creating Donor Accounts
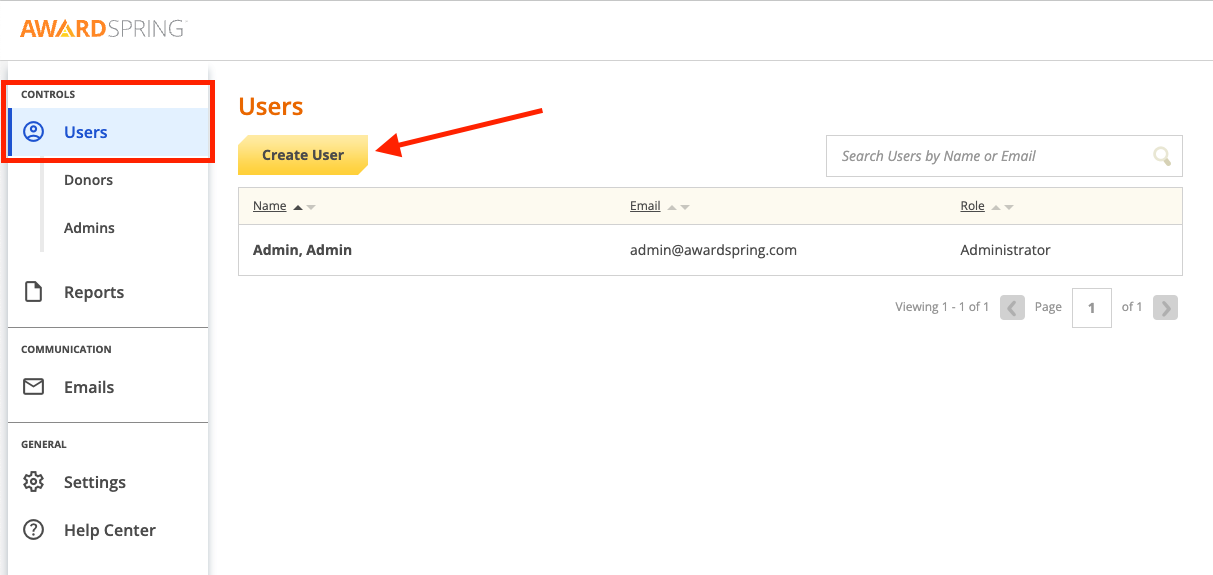
To create a donor account, click 'Users' from the left hand navigation menu and then click 'Create User'.
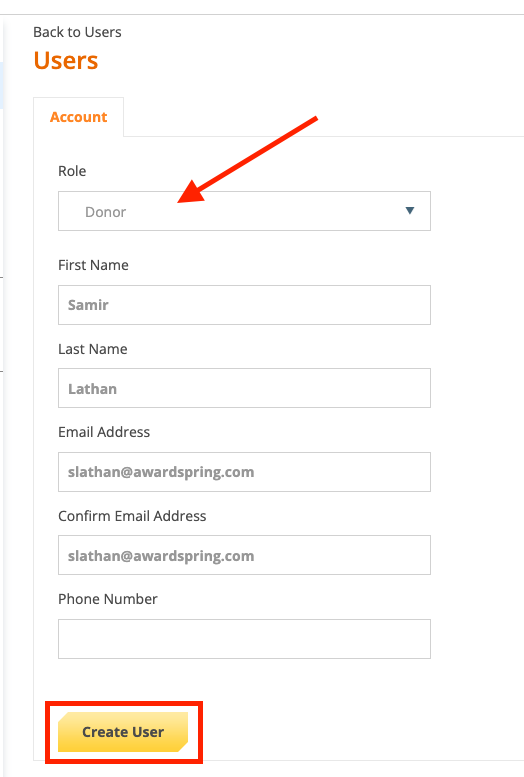
Select 'Donor' from the Role dropdown menu. Enter the donor's name, email address and phone number (optional), then click Create User.
Completing the Donor Profile
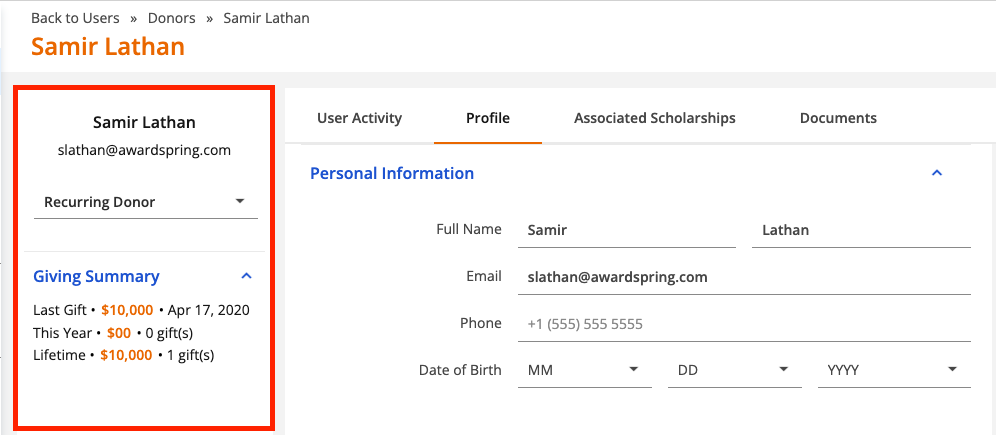
After creating a donor account, you'll immediately be taken to the donor Profile tab. Profiles allow you to track any details you might need for managing your donor outreach. The following key donor details are always visible on the left side of the profile.
- Name
- Contact inforomation
- Stage
- Giving Summary
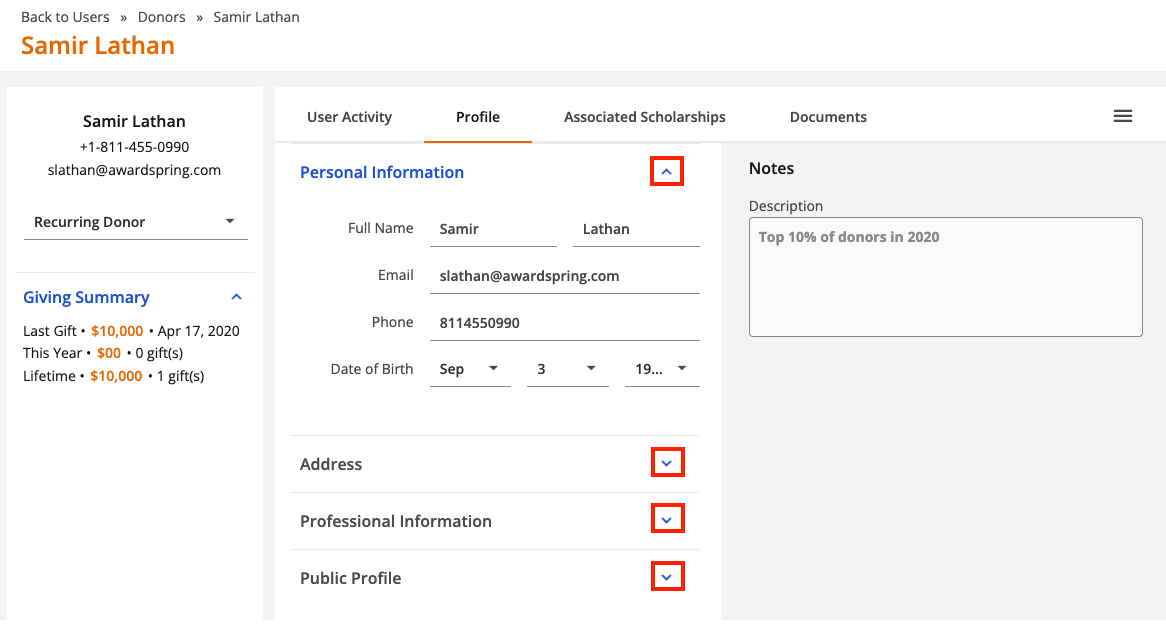
Complete the profile tab by filling in any applicable information in the Personal Information, Address, Professional Information and Public Profile sections. You can also add notes about the donor on the Notes field in the top right corner of the profile.
.png-0-7d0c60ca-7cd7-4e53-83db-4a47a6fe2b34.png)
Use the arrows to collapse and expand sections of the profile page as needed.
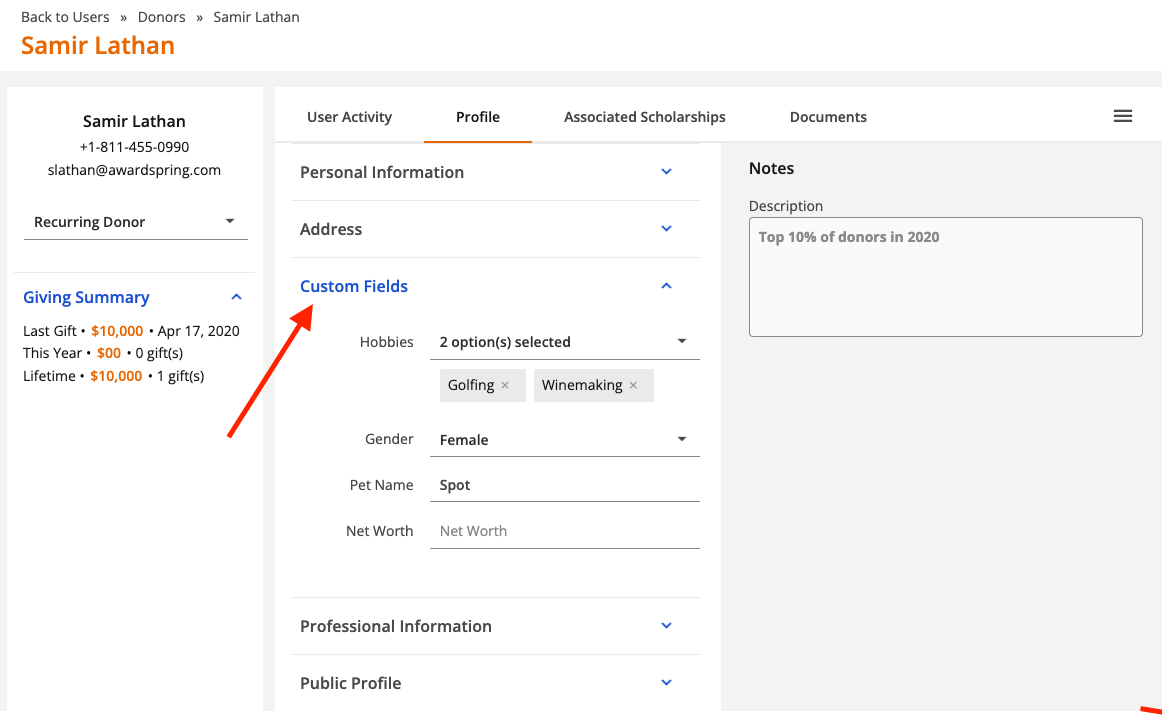
Creating a Custom Field
Create custom fields on the donor profile to track additional details that are important for managing your donor outreach. Once configured, custom fields will appear as part of the Profile tab on the donor record.
To create a custom field, click Settings and then Donor Profiles.
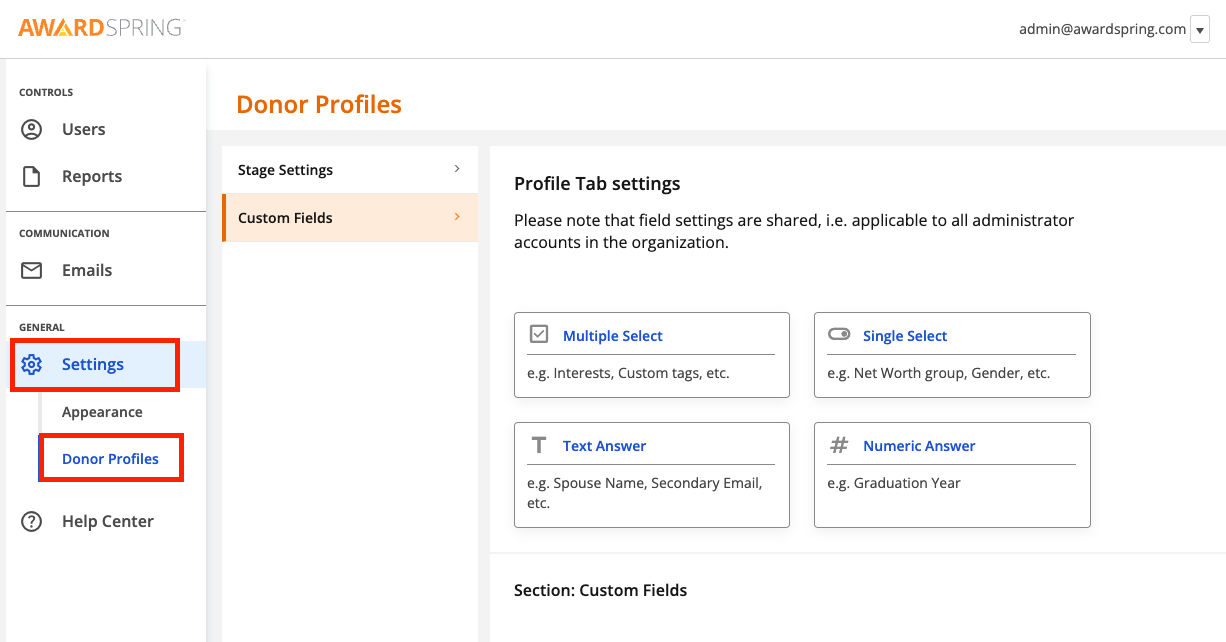
You can choose from different field types depending on what type of data you need to capture.
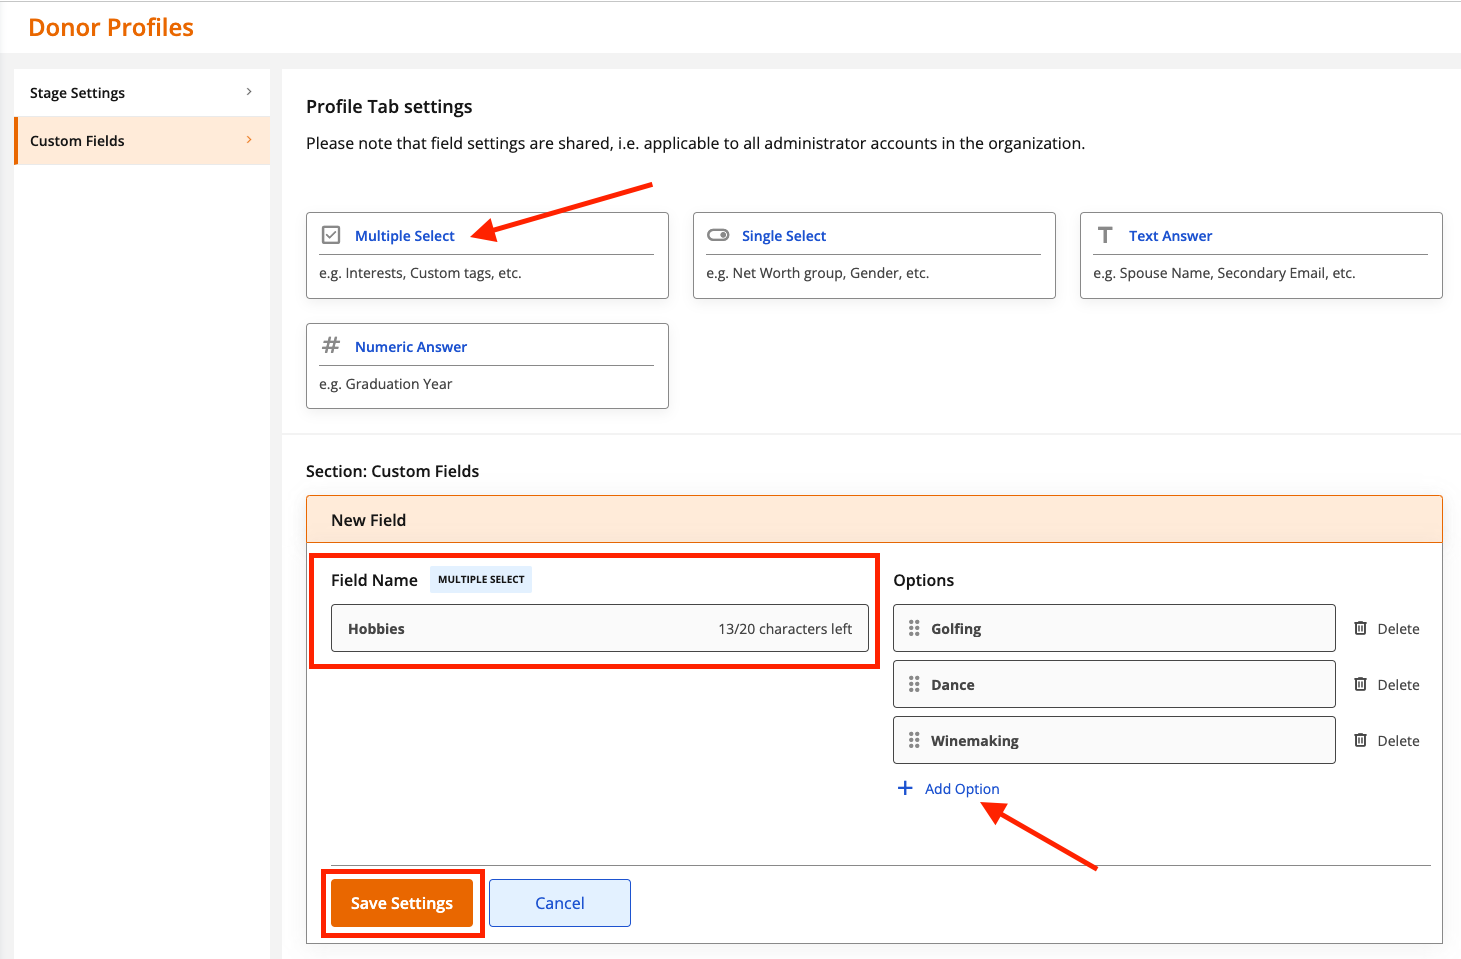
A Multiple Select field allows you to select more than one option from a list. This field type might be used for capturing a donor's interests/hobbies or for using custom tags. To create a multiple select field, click on the Multiple Select option, then enter a name for the field. Add answer options by clicking 'Add Option'. Click Save Settings when you're done.
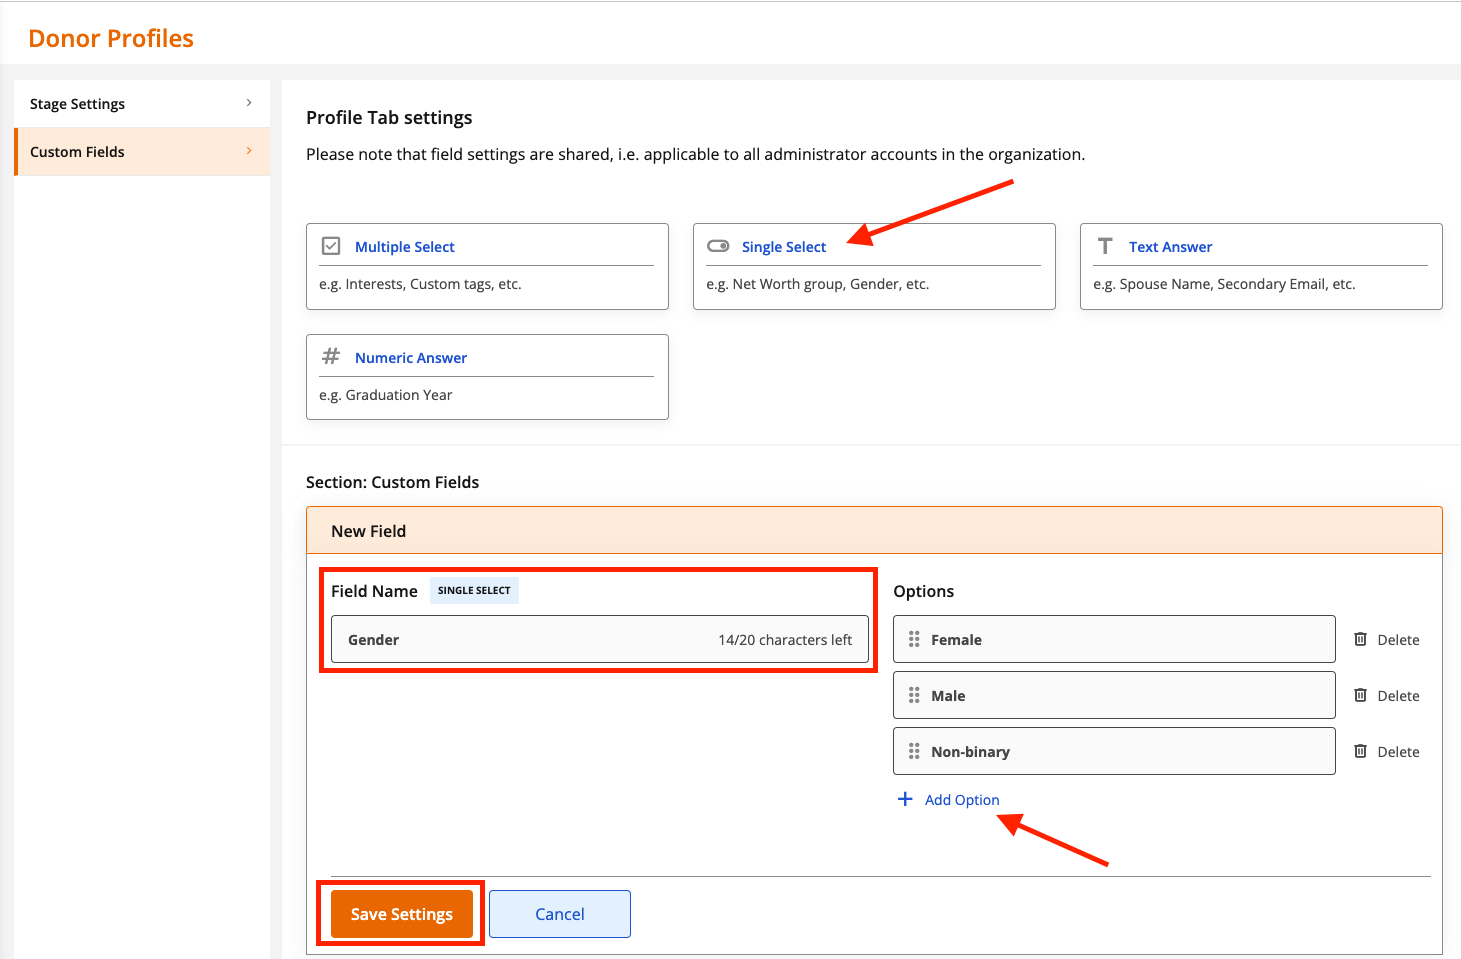
A Single Select field allows you to select a single option from a list. You might use this field to capture information such as the donor's gender, marital status, etc. To create a single select field, click on the Single Select option, then enter a name for the field. Add answer options by clicking 'Add Option'. Click Save Settings when you're done.
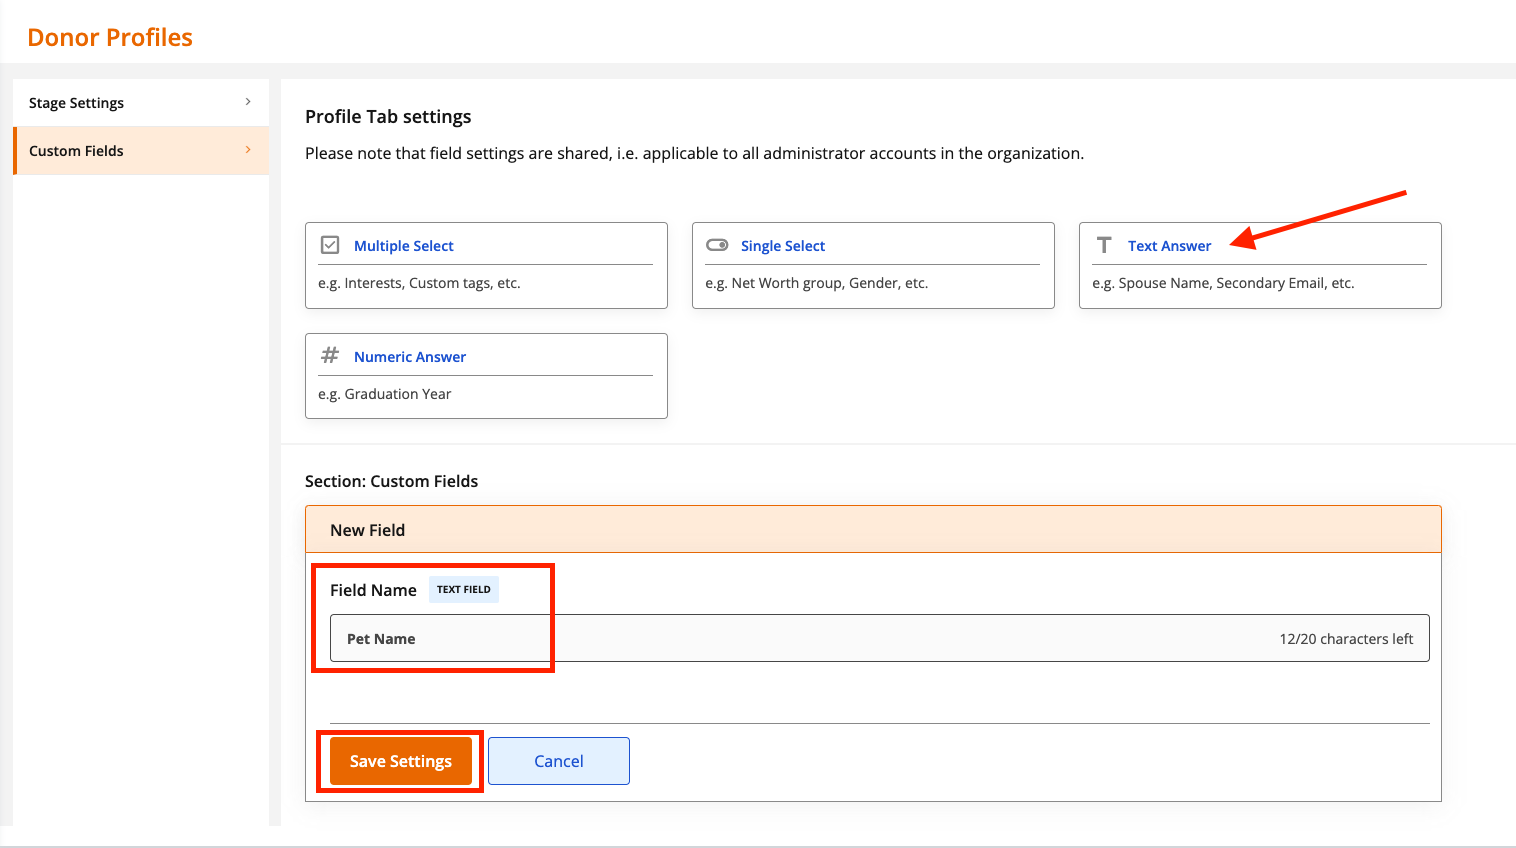
A Text Answer field allows you to enter free text into a box. You might use this field type to track information such as the donor's spouse, pet name, alternate email address, etc. To create a text answer field, click on the Text Answer option, then enter a name for the field. Click Save Settings when you're done.
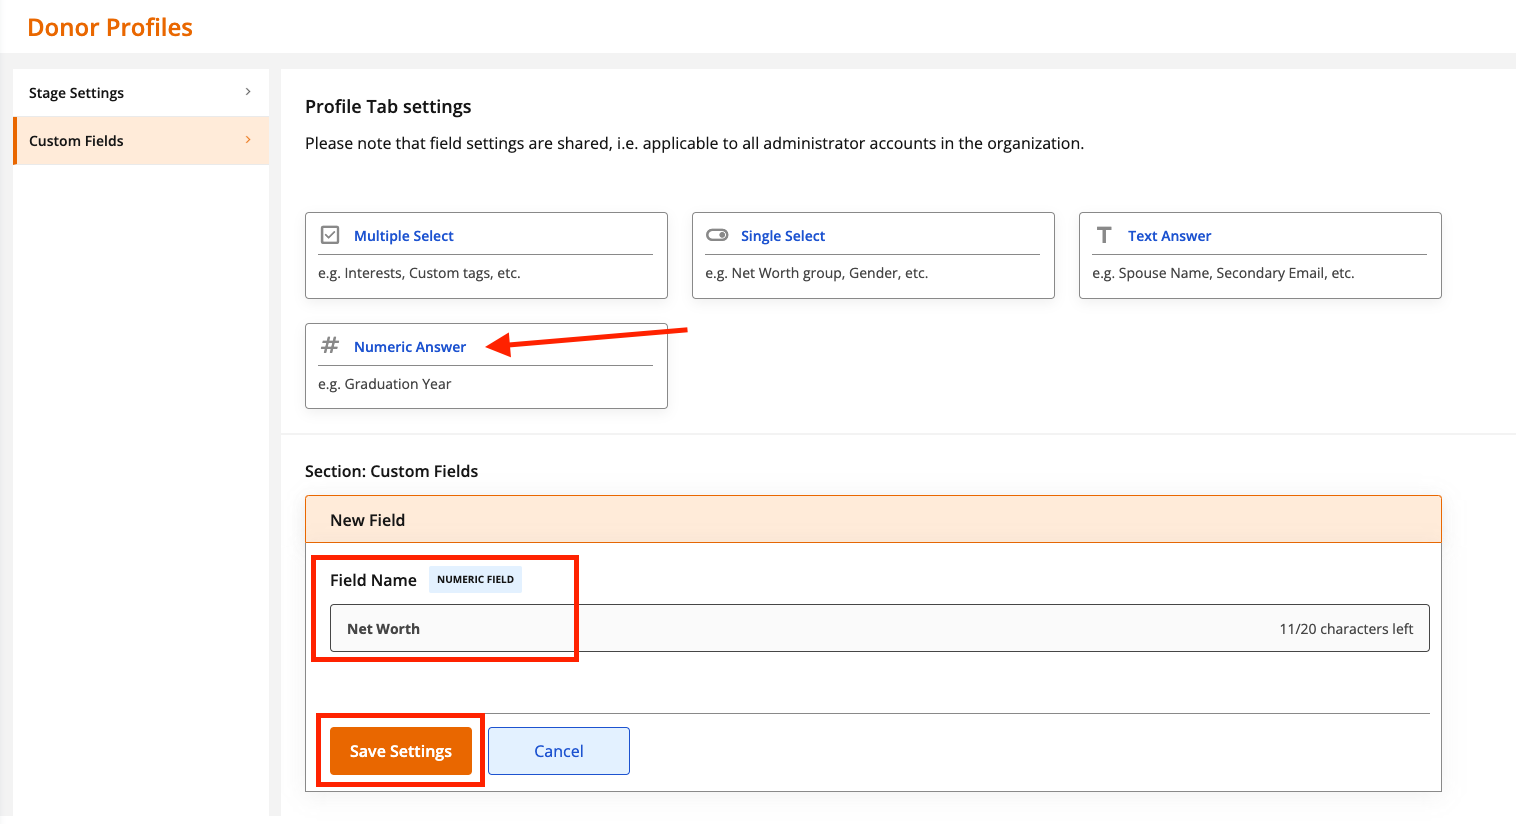
A Numeric Answer field allows you to enter numeric data. You might use this field to track things like a donor's net worth. To create a numeric answer field, click on the Numeric Answer option, then enter a name for the field. Click Save Settings when you're done.
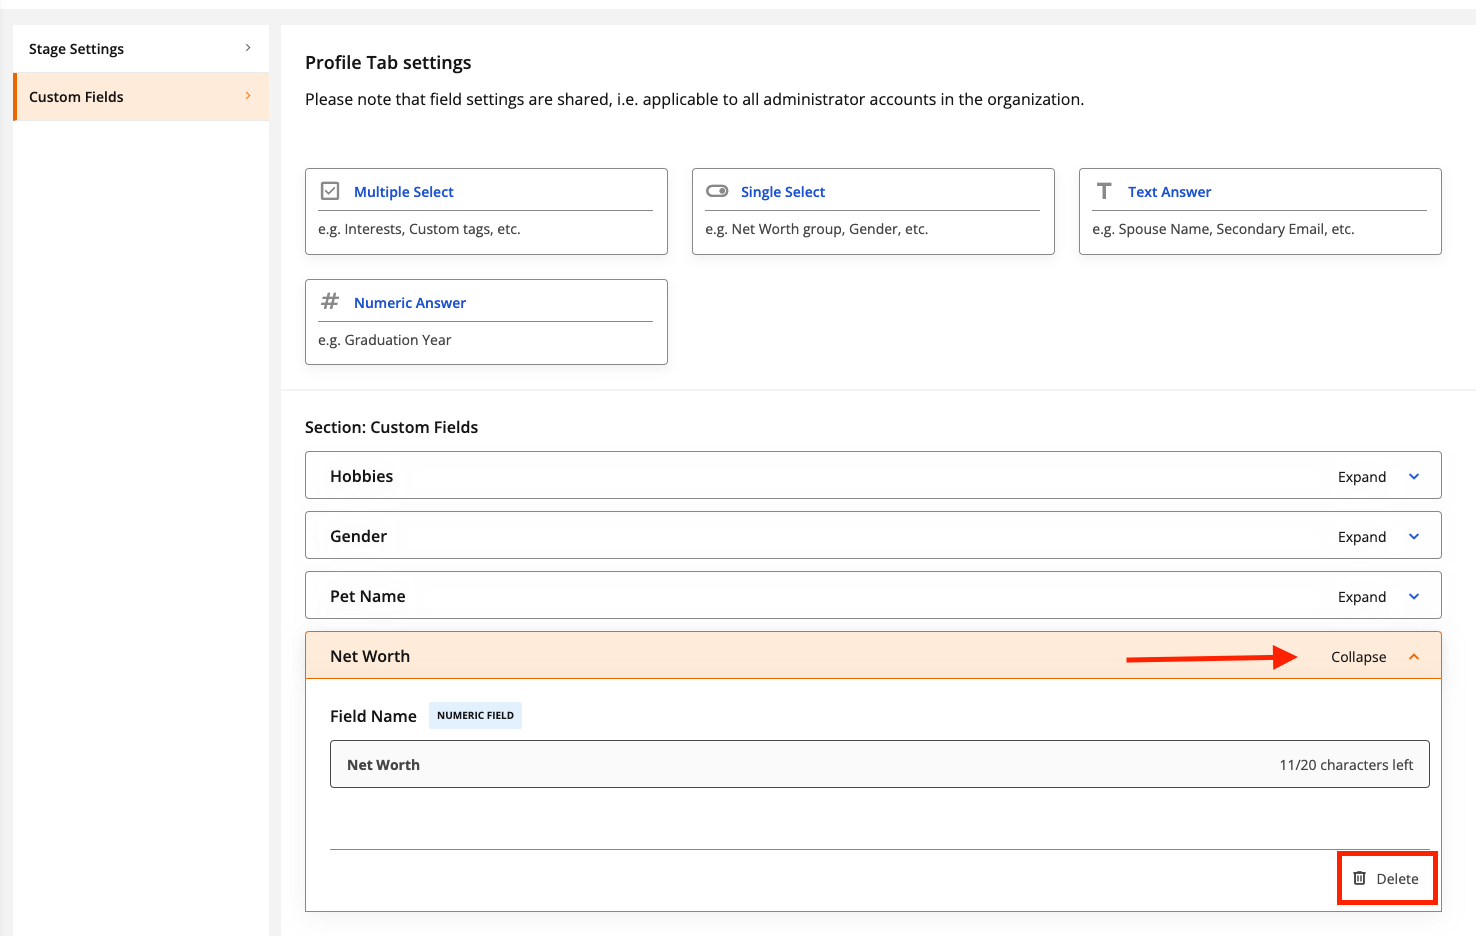
Deleting a Custom Field
To delete a custom field, click on the field name to expand it, then click Delete.
Stage Settings
Stage settings allow you to categorize and segment donors. Click on Settings and then Donor Profiles to display the donor stage settings. There are six (6) default stage settings: Not Set, Lead, Prospect Donor, First-year Donor, Recurring Donor, Lapsed Donor and Do Not Contact.

Stages can be customized simply by changing the stage name. To change the stage name, click into the box and change the name of the stage.
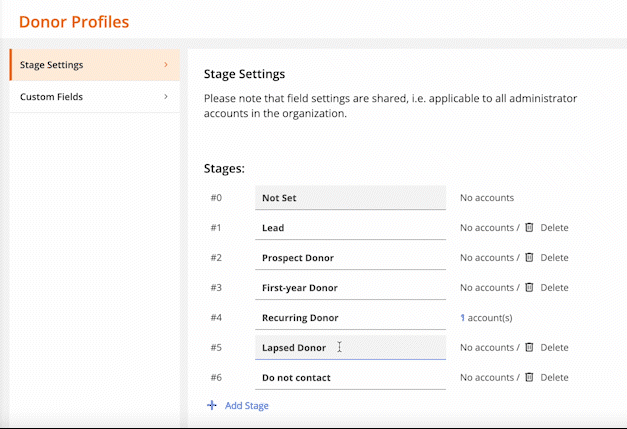
You can also add a new stage by clicking 'Add Stage'. Simply enter the new stage name in the field that appears.

Finally, you can delete a stage by clicking Delete.
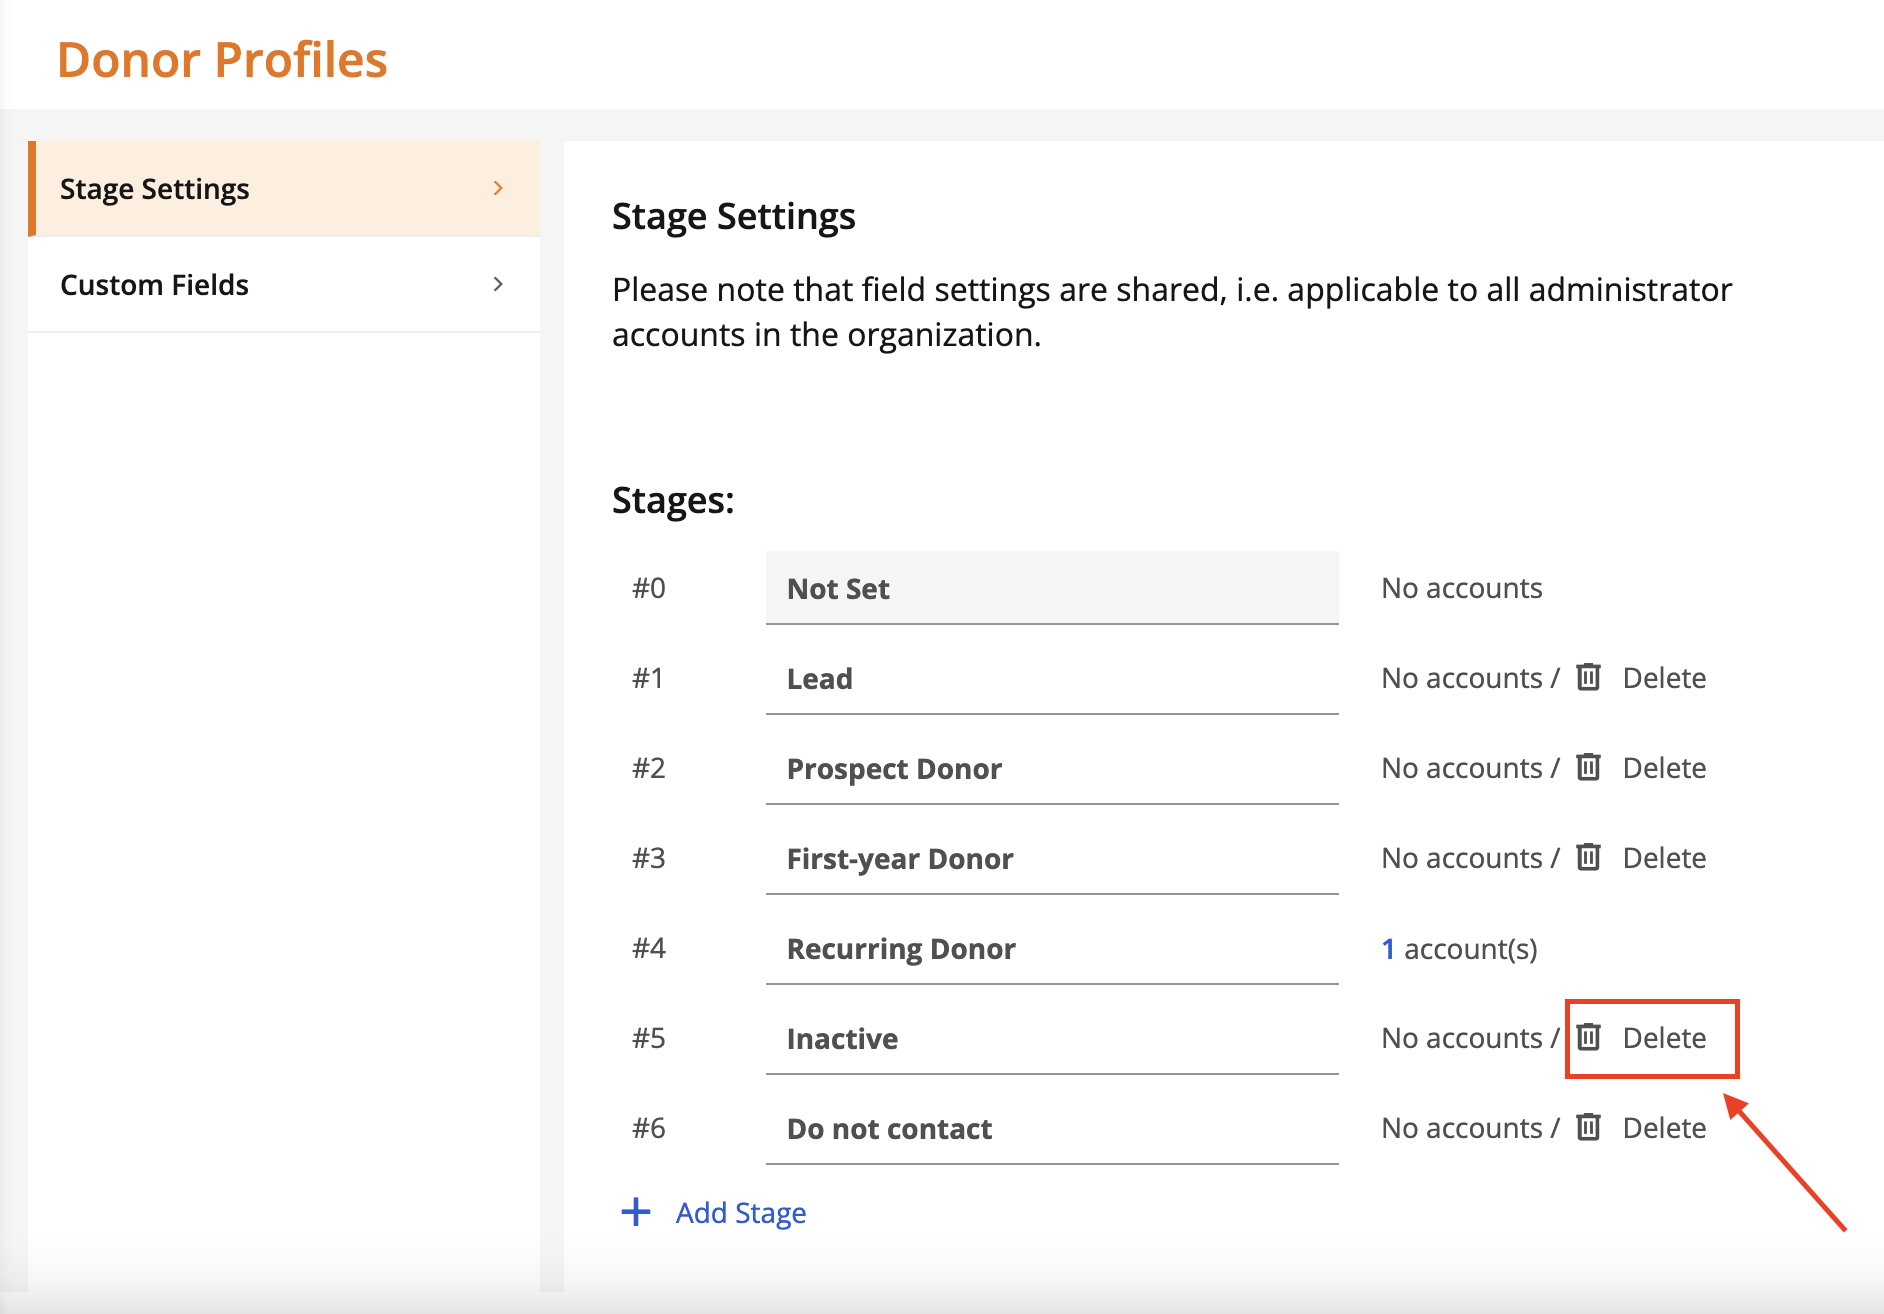
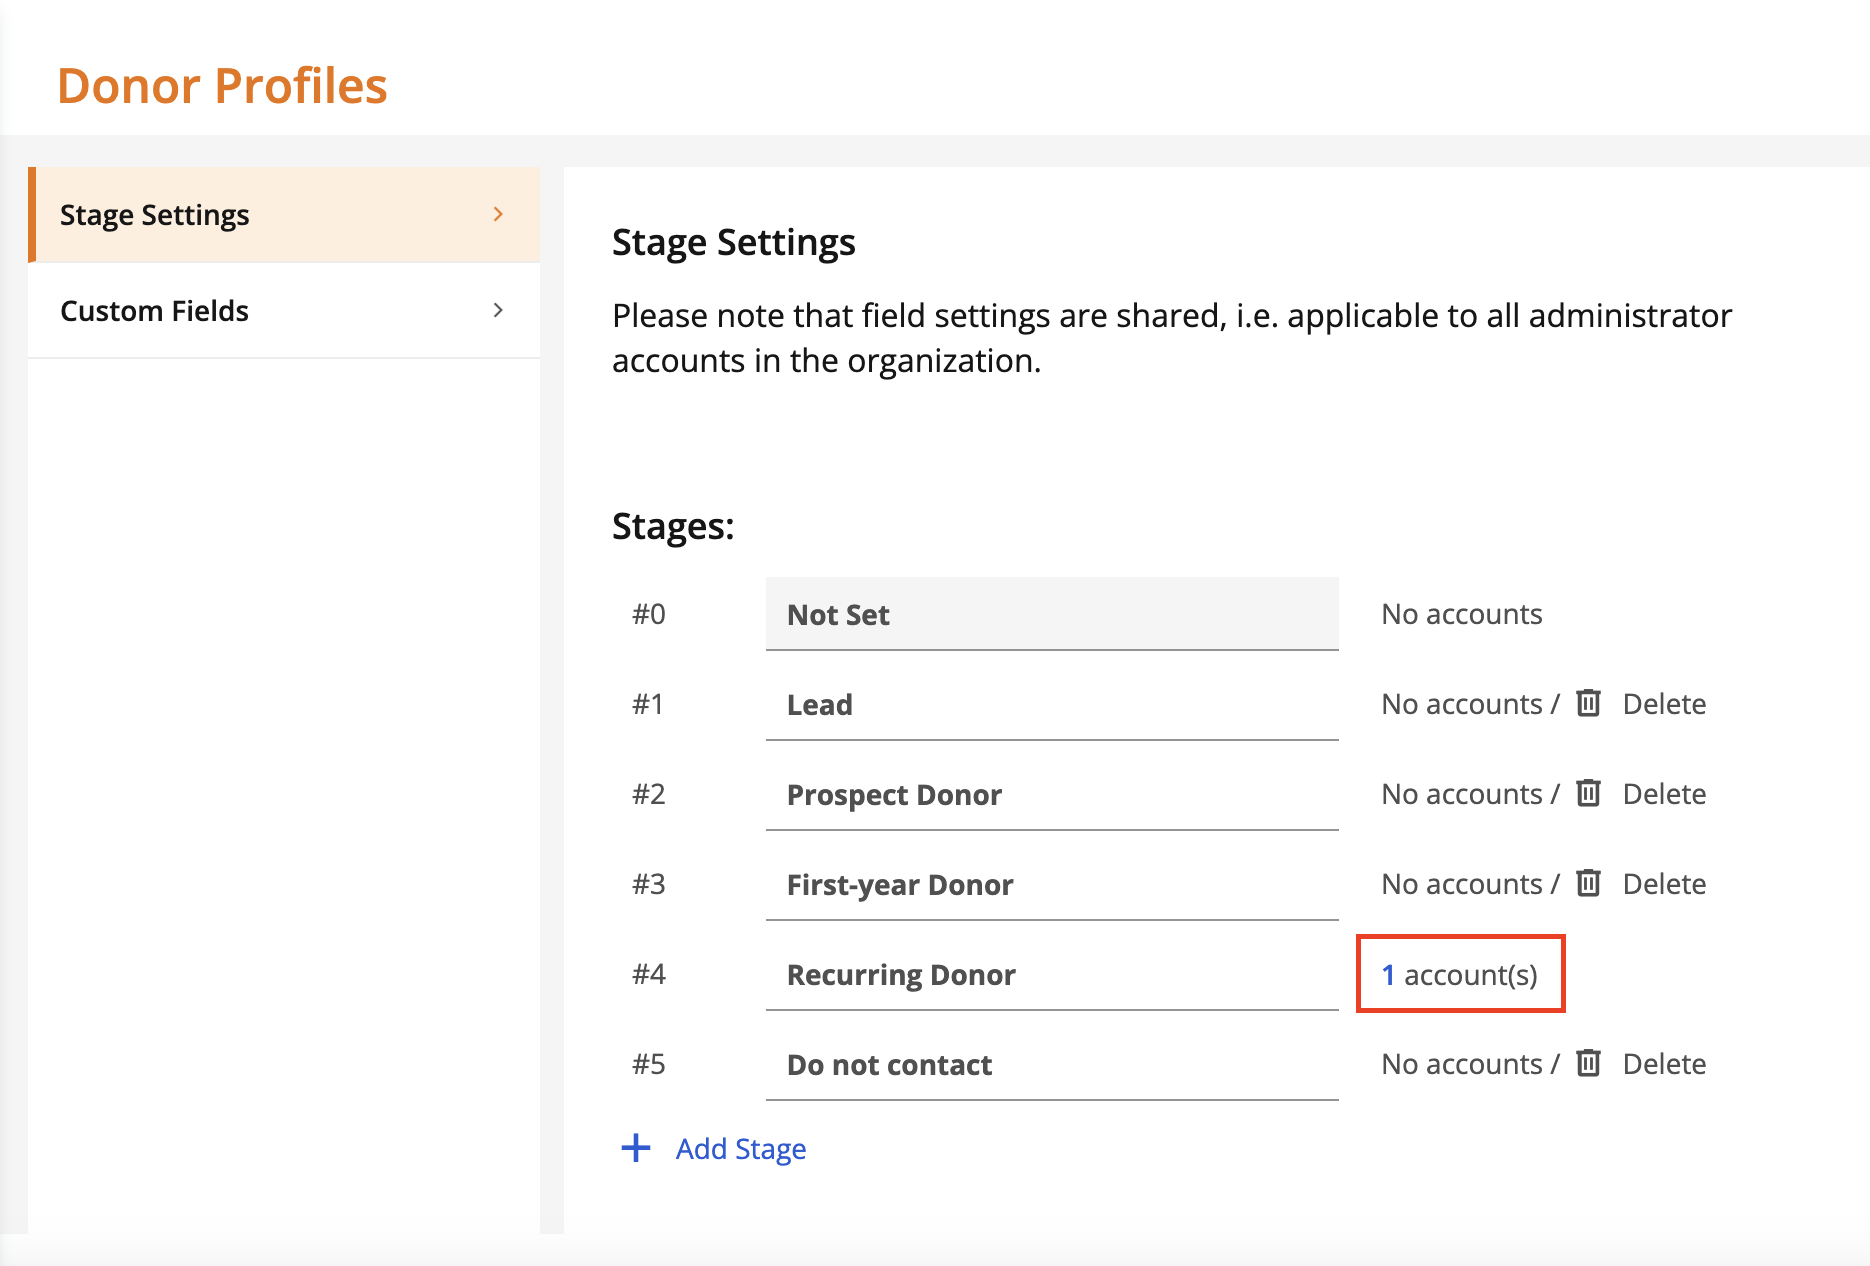
Note: after assigning donors to stages, the number of donors assigned to each stage will be displayed. You will not be able to delete a stage that has donors assigned.
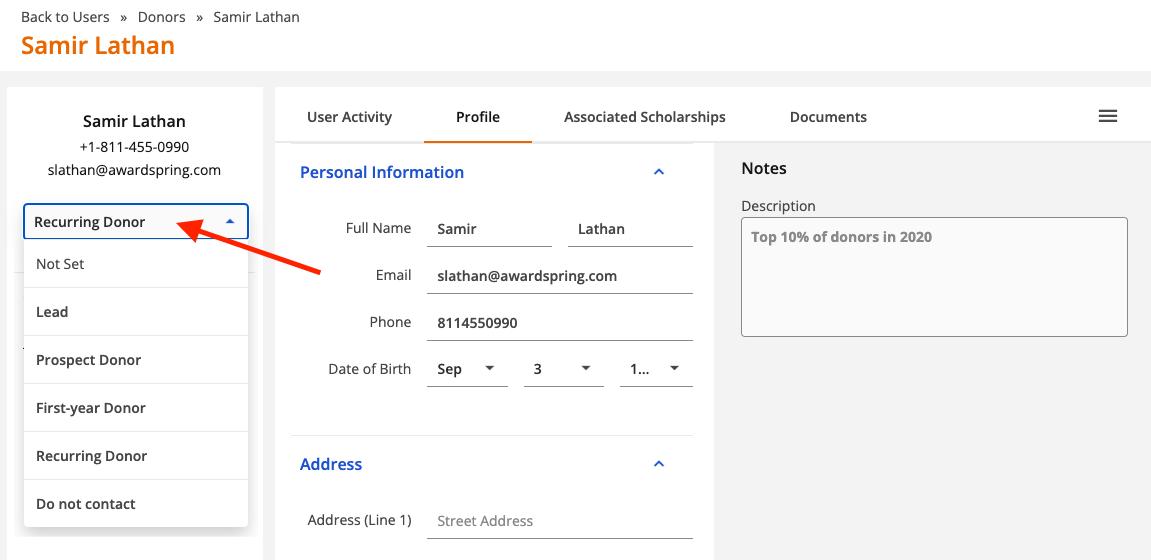
To update the stage for a donor, open the donor record (under Users), click to expand the dropdown shown below and select the appropriate stage.
Documents
Use the documents section of the donor record to keep track of important contracts or other assets pertaining to the donor. Simply open a donor record (via Users) and click the Documents tab to get started.
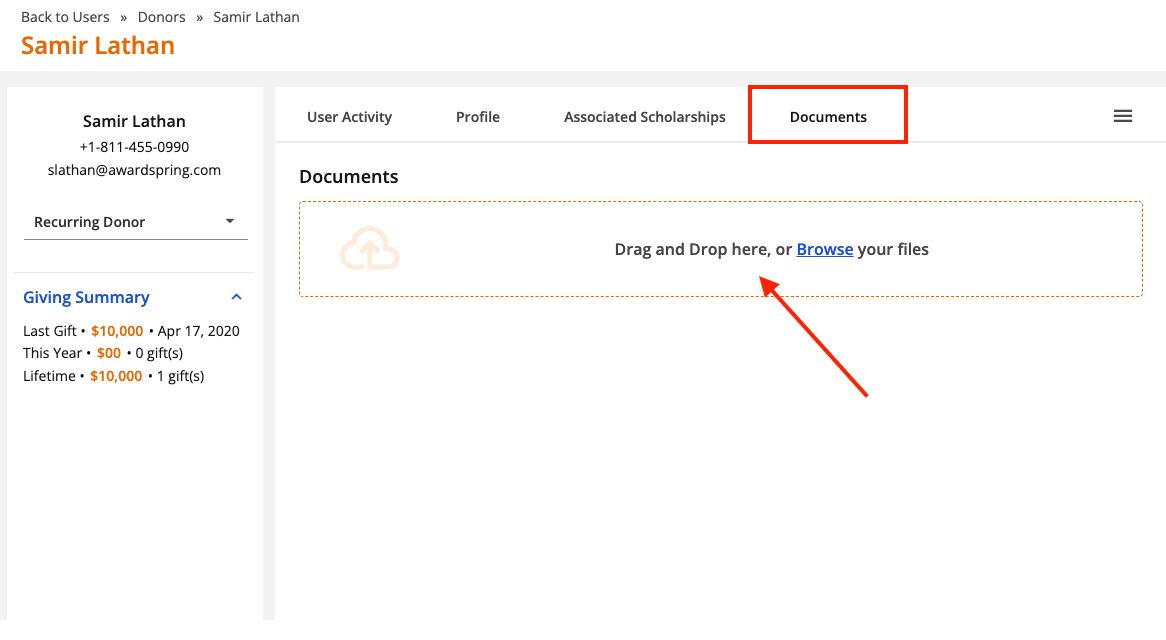
You can drag and drop files into this section or browse for files on your local drive by clicking Browse.
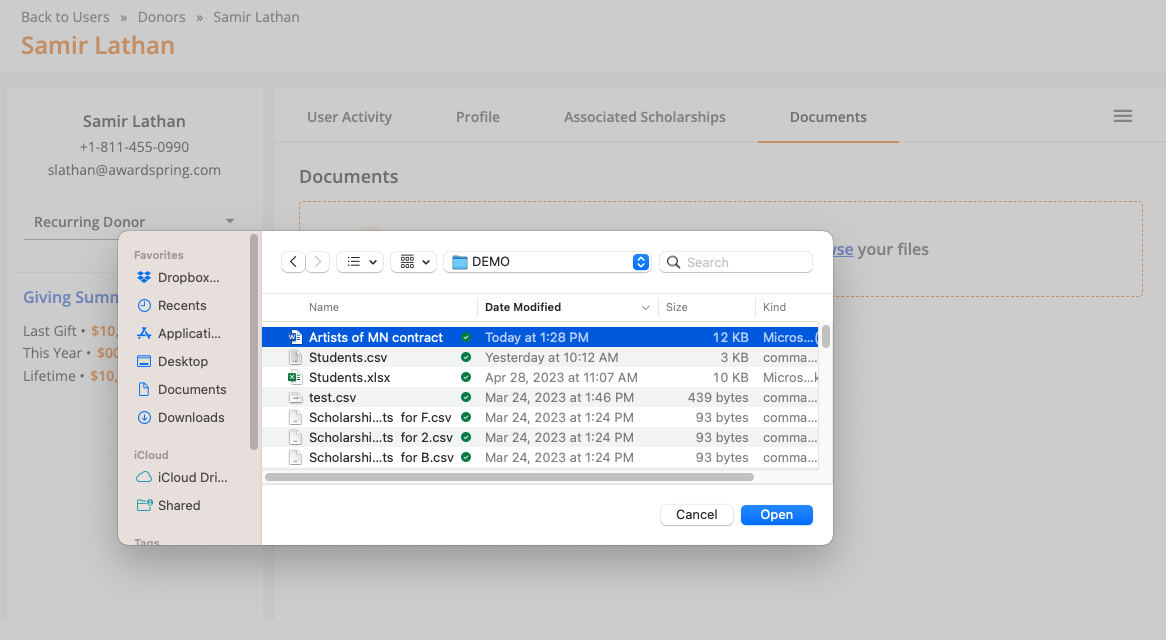
Select the file and proceed to open it.

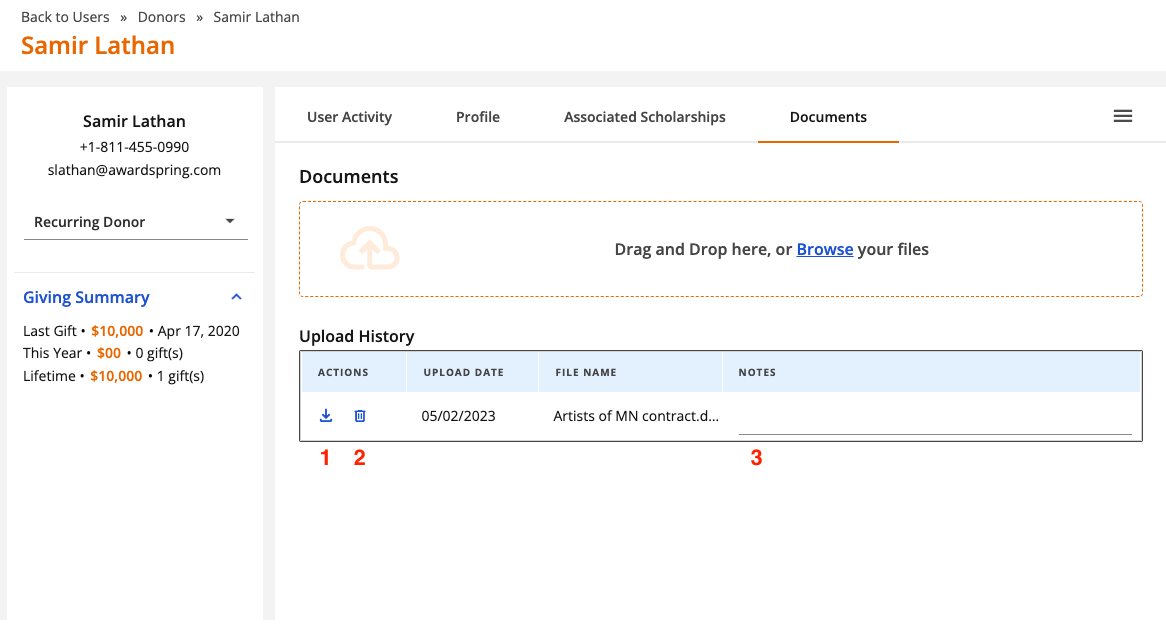
A confirmation message will indicate that the file has been uploaded successfully and you will see the file under the 'Upload History' section. From here you can download (1), delete (2) or add notes (3) about the document.
User Activity
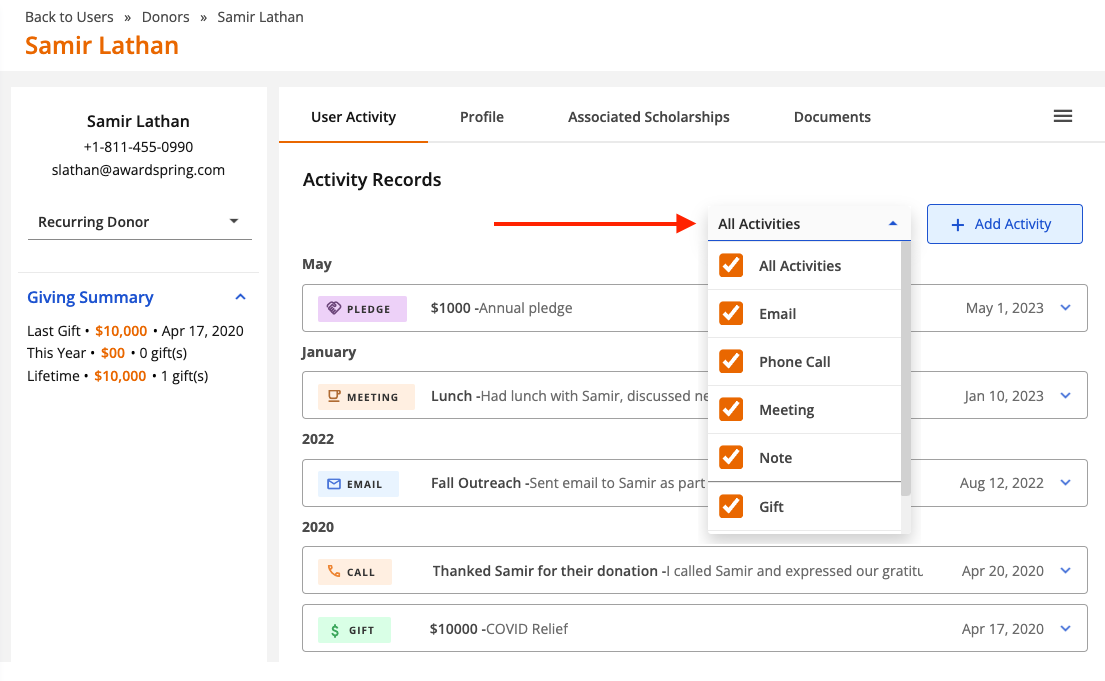
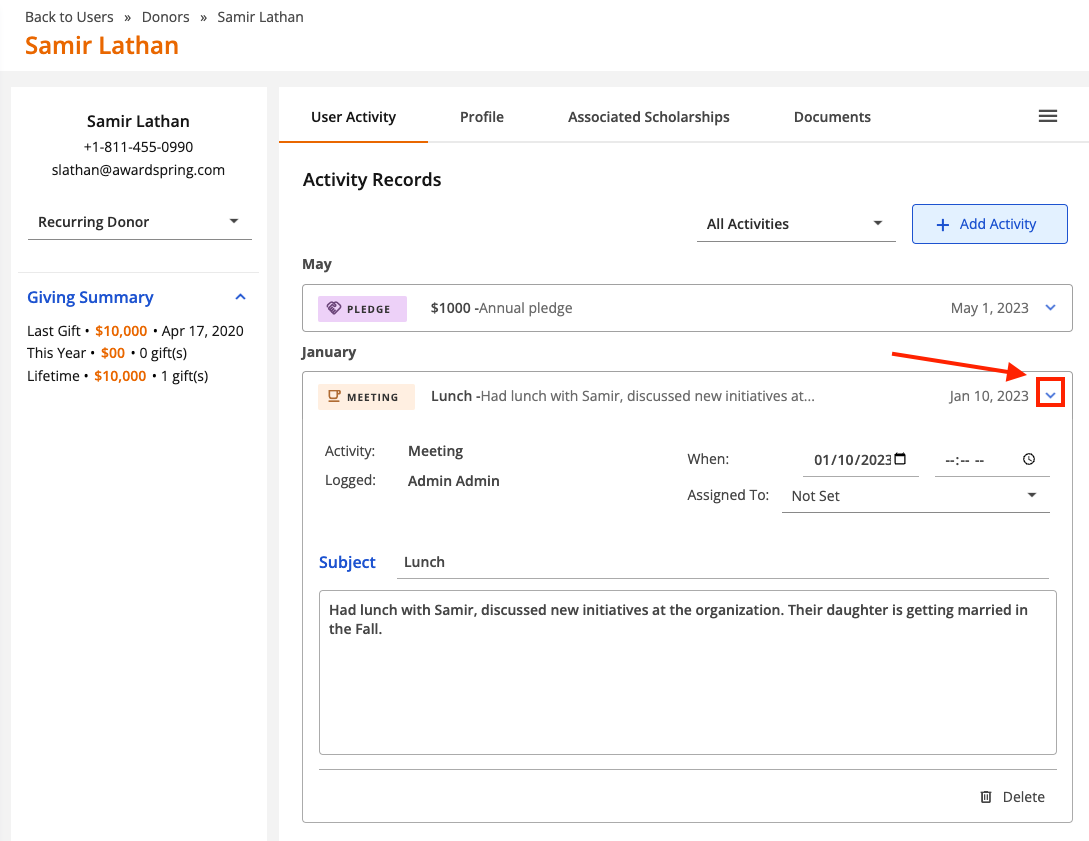
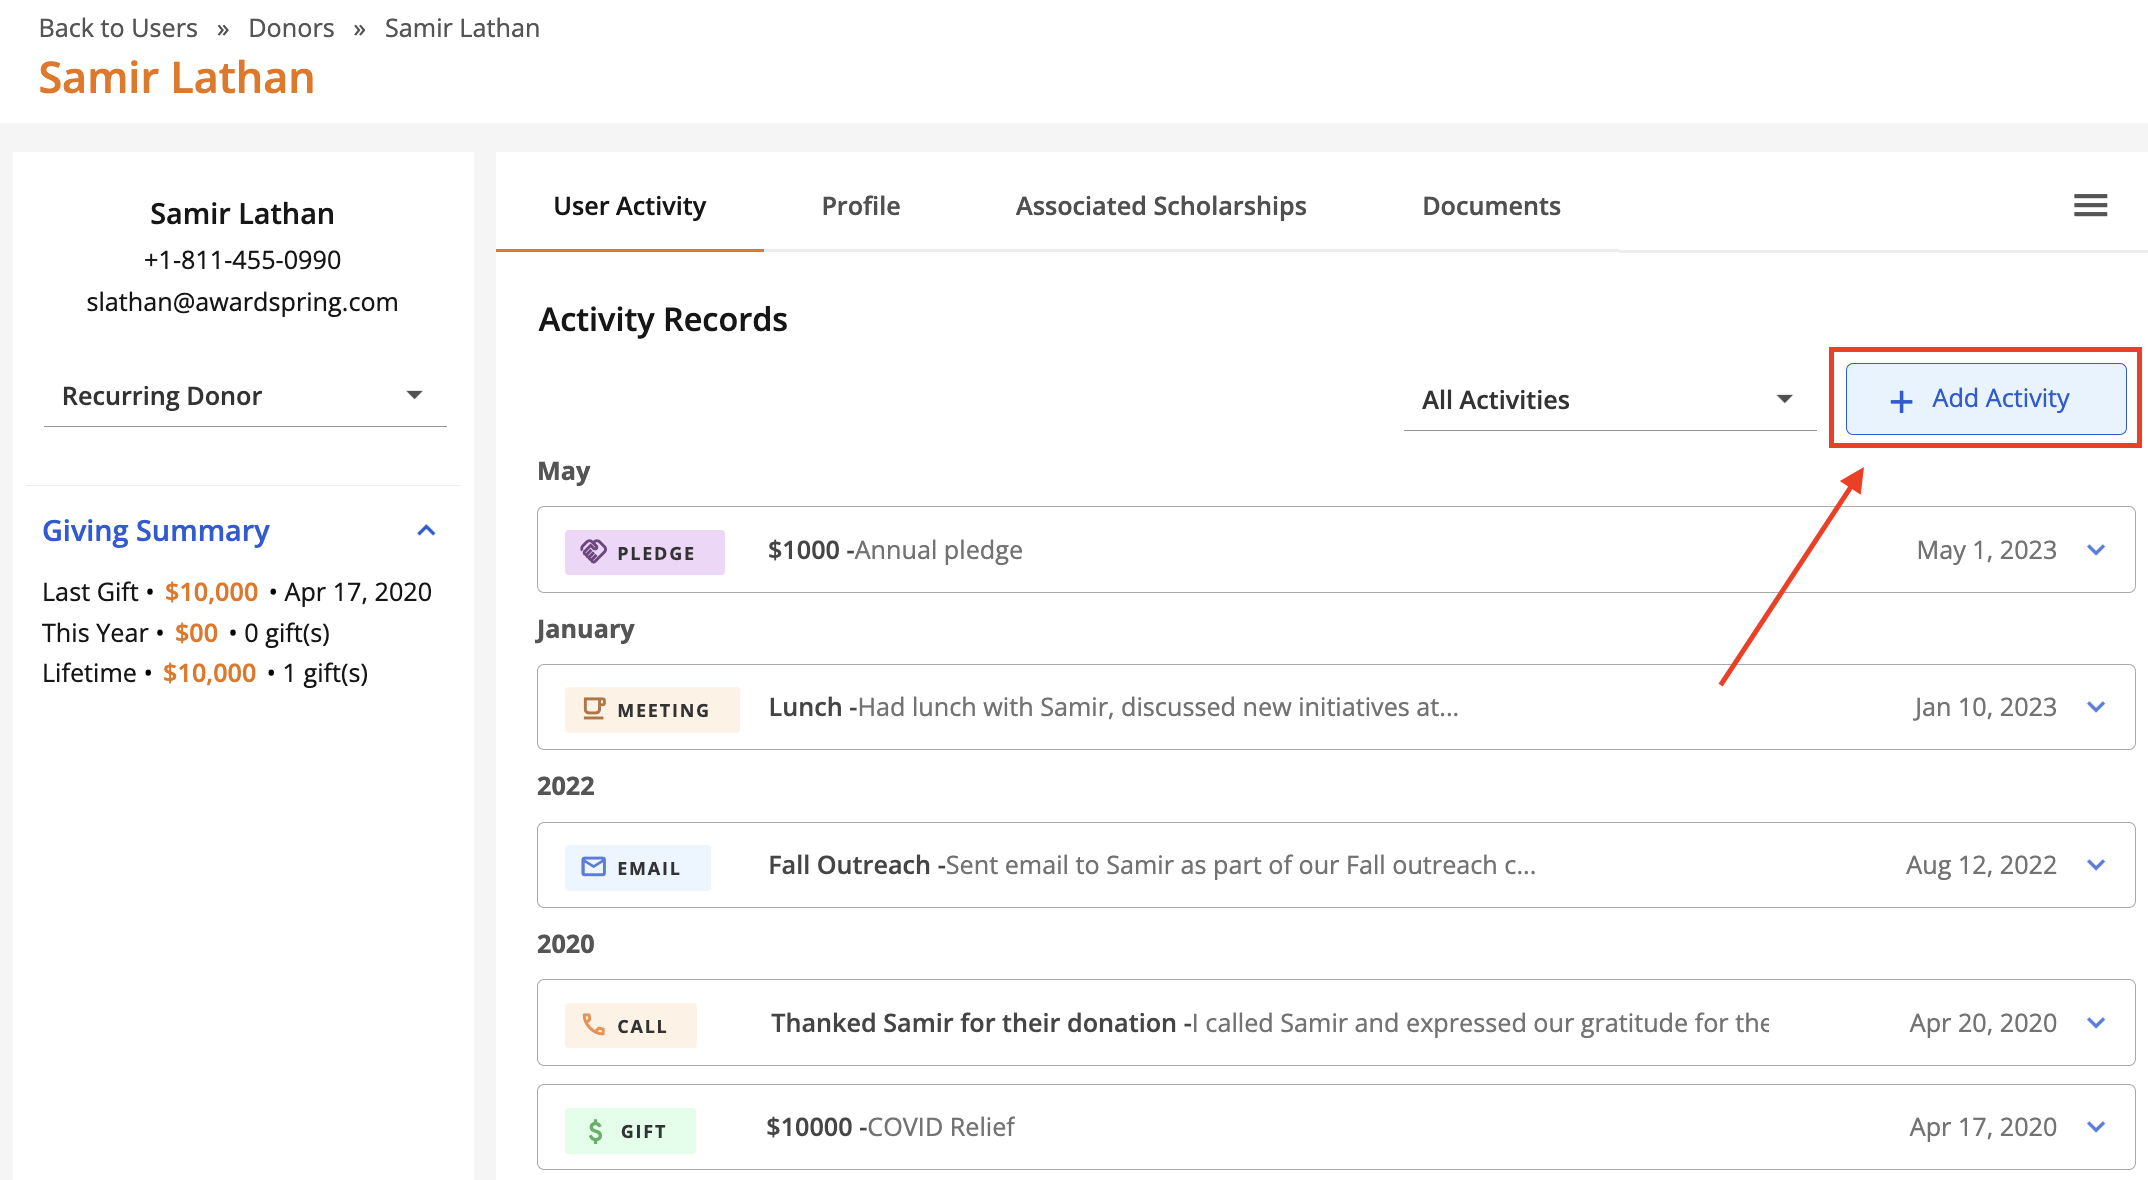
Track interactions with donors via the 'User Activity' tab on the donor profile. Supported activities include emails, phone calls, meetings, notes, pledges and gifts. Activity is displayed chronologically (by year) with the most recent activity at the top. The current year's activities are organized by month. The activity type and date are display for each activity.

Click the dropdown menu to filter on a specific activity type.
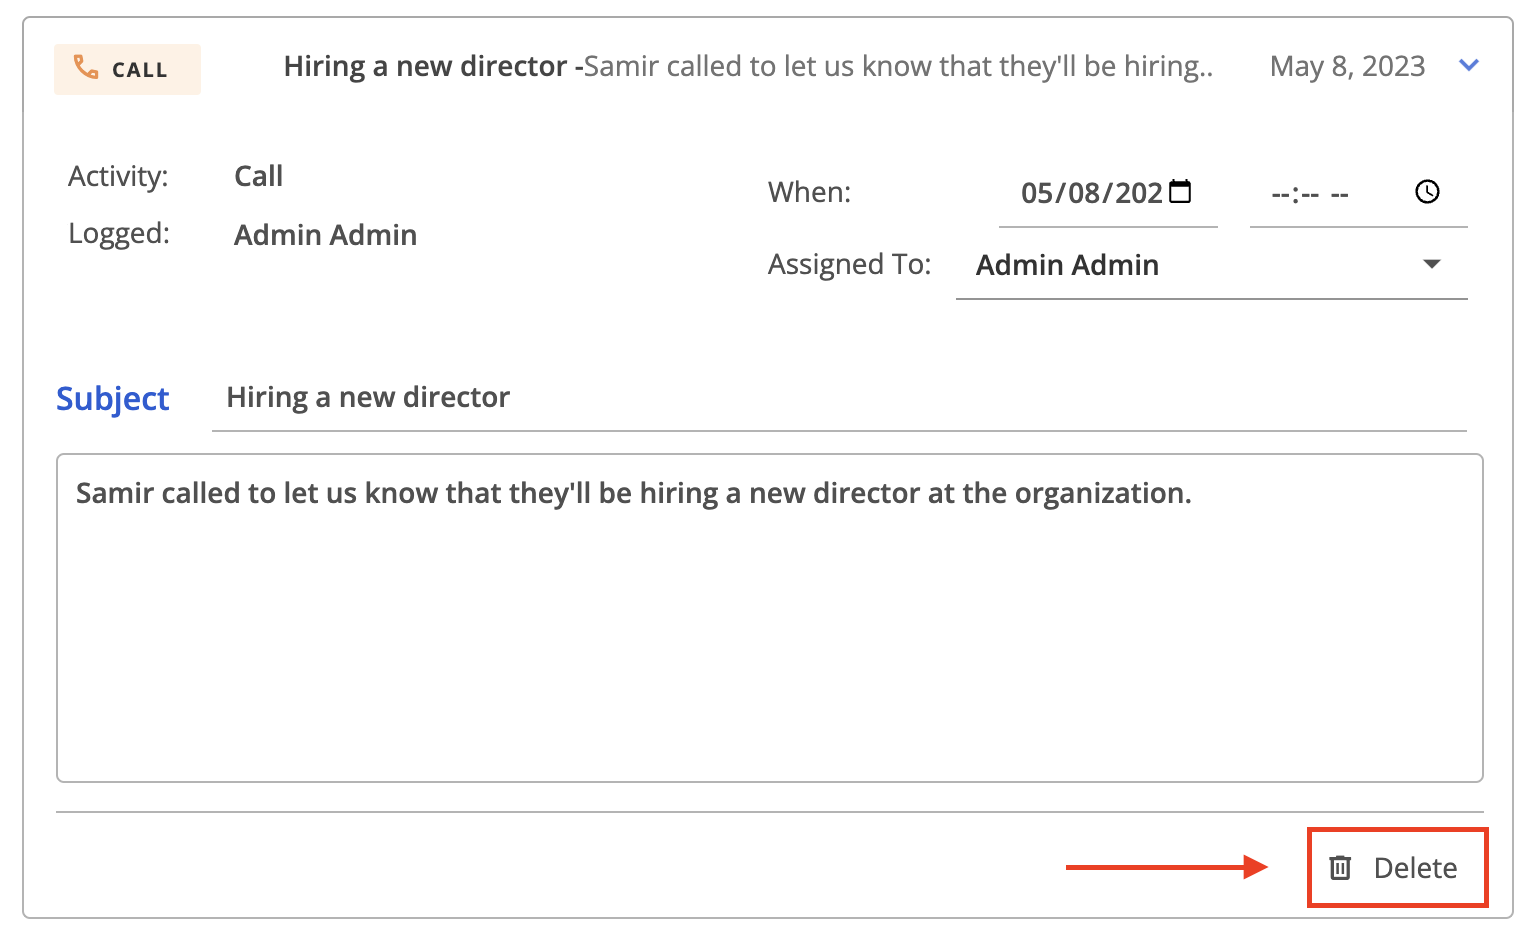
Click the arrow to view the details for an activity.
Adding an Activity
To get started, click 'Add Activity'.
Click the 'Set Activity' dropdown to select the activity type.
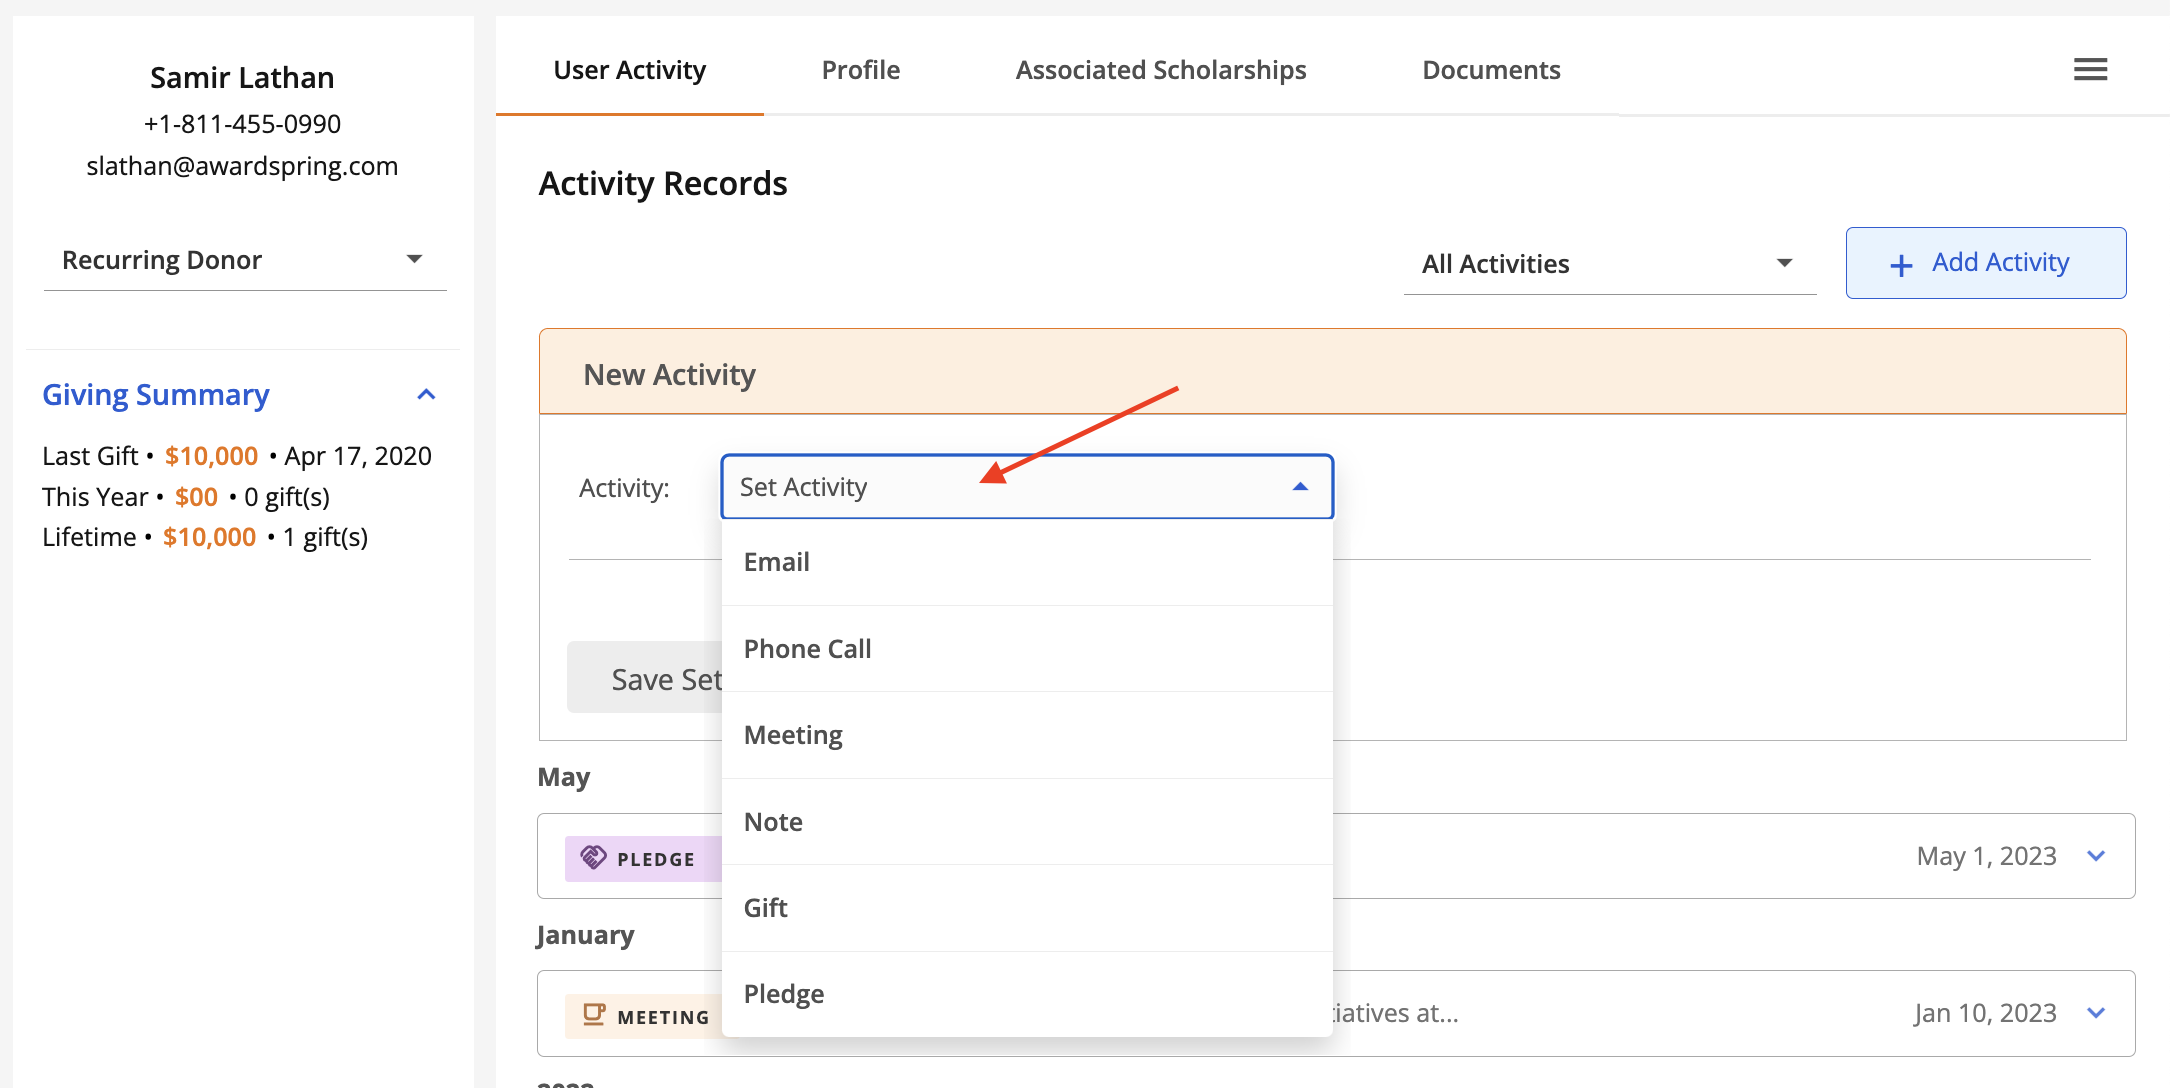
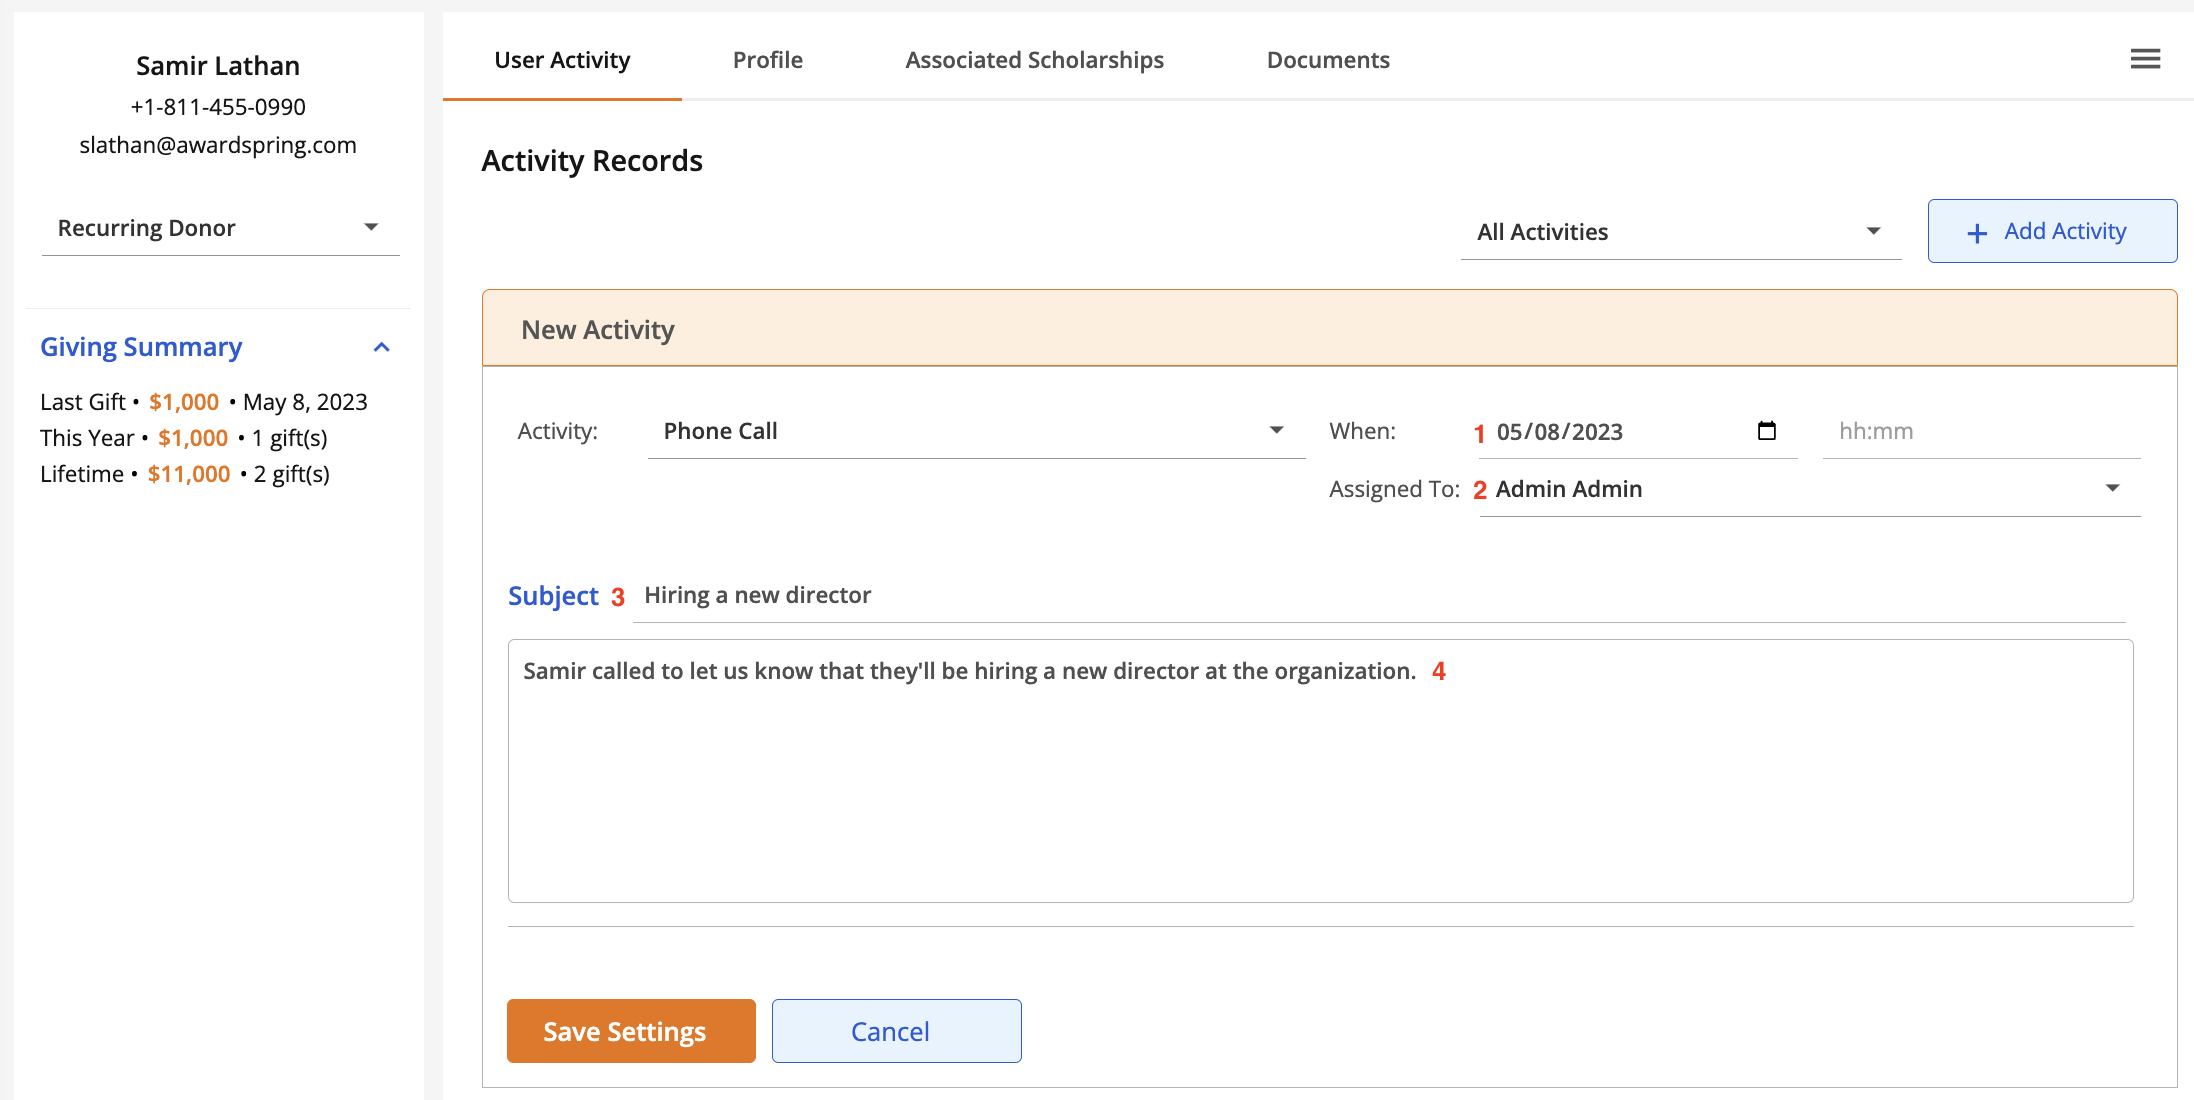
For the Email, Phone Call, Meeting and Notes activity types, the following fields are available:
- When: the date and (optionally) time that the activity occurred.
- Assigned To (optional): the activity owner. This defaults to the admin who is logging the activity but can be changed to another admin or 'Not Set'.
- Subject: the subject of the activity.
- Details: details of the activity.
For the Gift and Pledge activity types, the following fields are available:
- When: the date and (optionally) time that the activity occurred.
- Assigned To (optional): the activity owner. This defaults to the admin who is logging the activity but can be changed to another admin or 'Not Set'.
- Amount: the amount of the pledge or gift.
- FundID (optional): the fund the pledge or gift is intended for.
- Subject: the subject of the activity.
- Details: details of the activity.
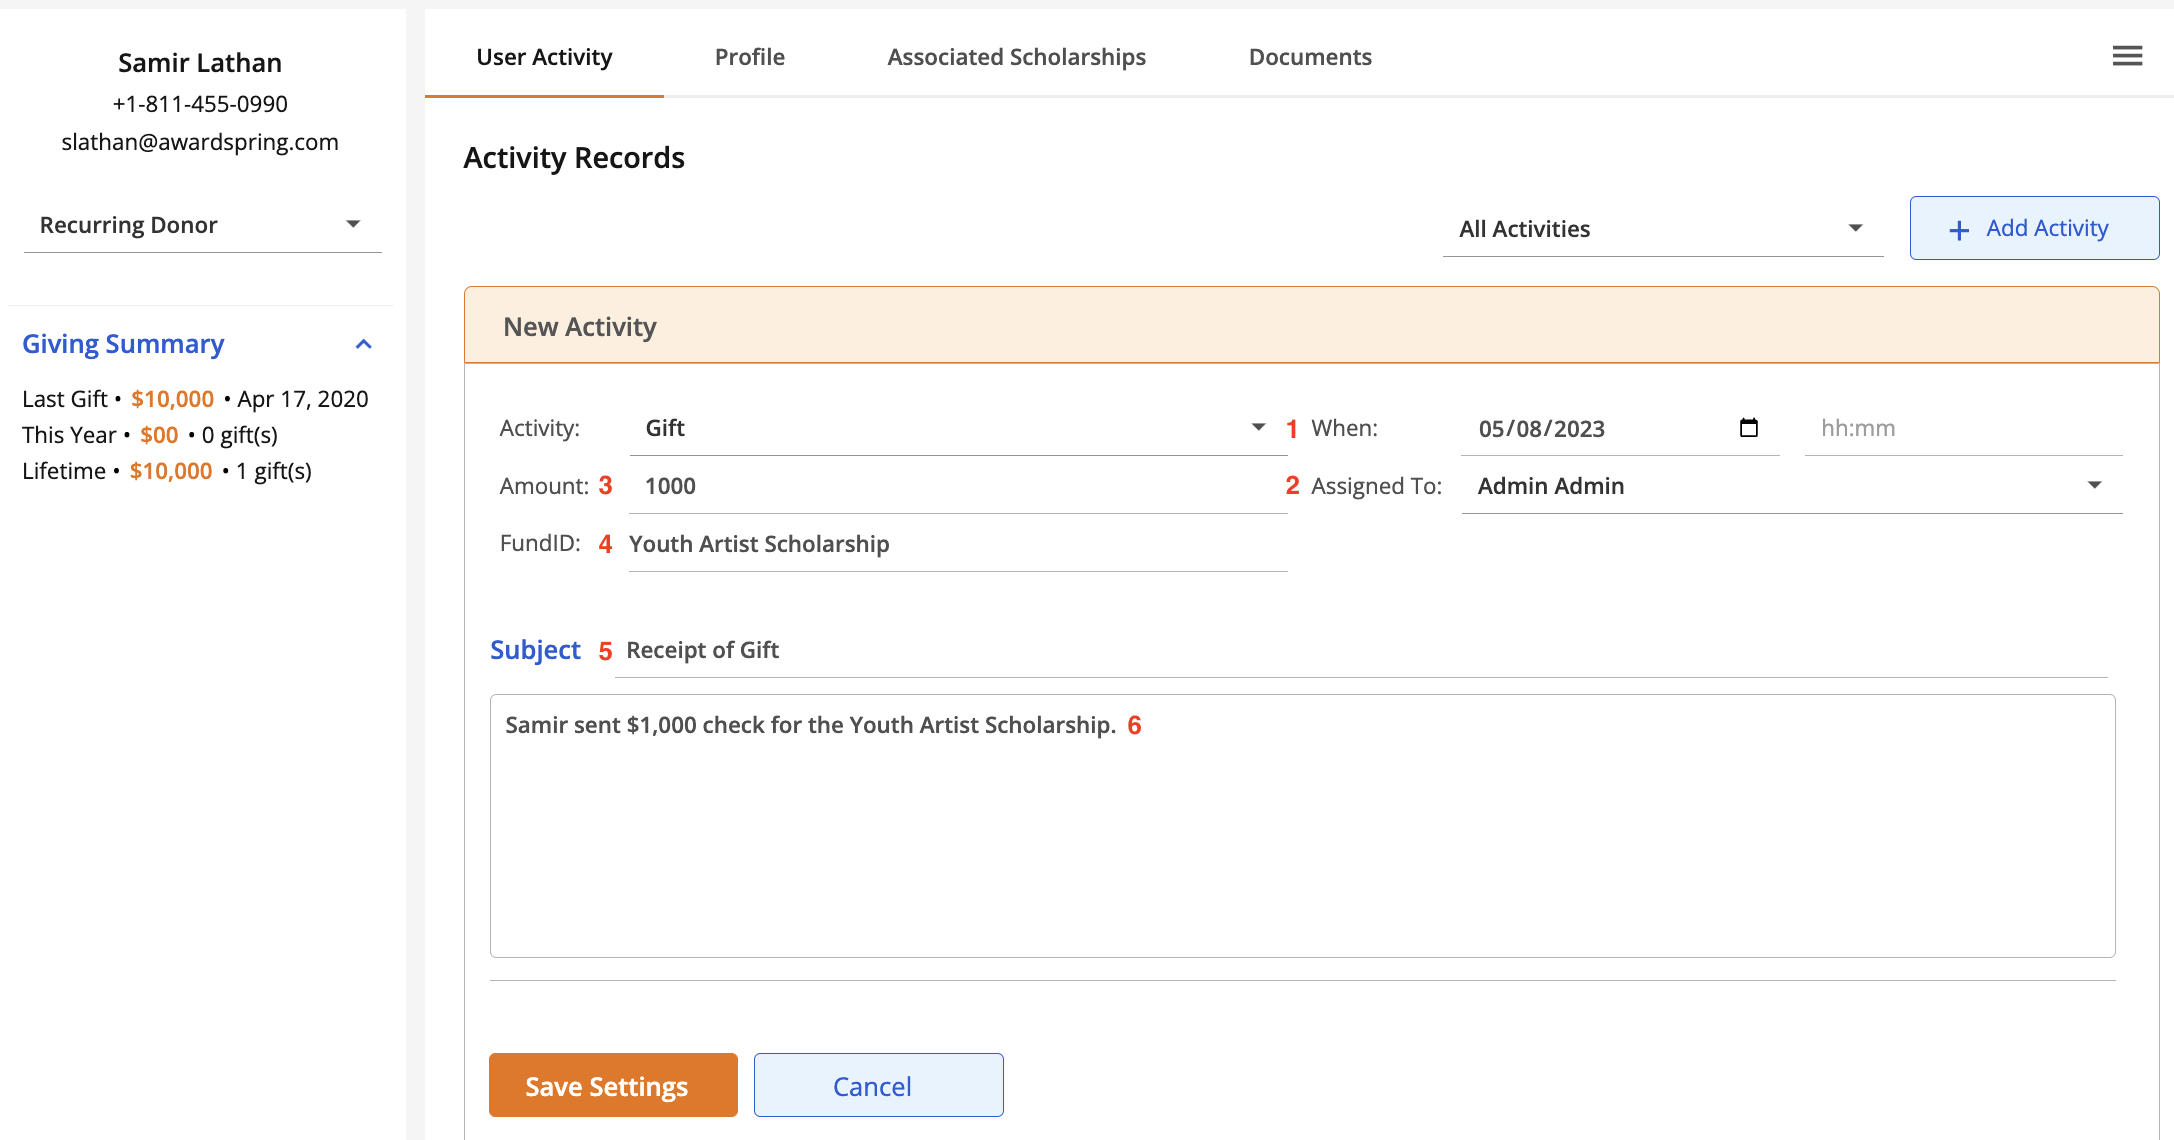
Once you've selected the activity type and filled in any applicable fields, click Save Settings.
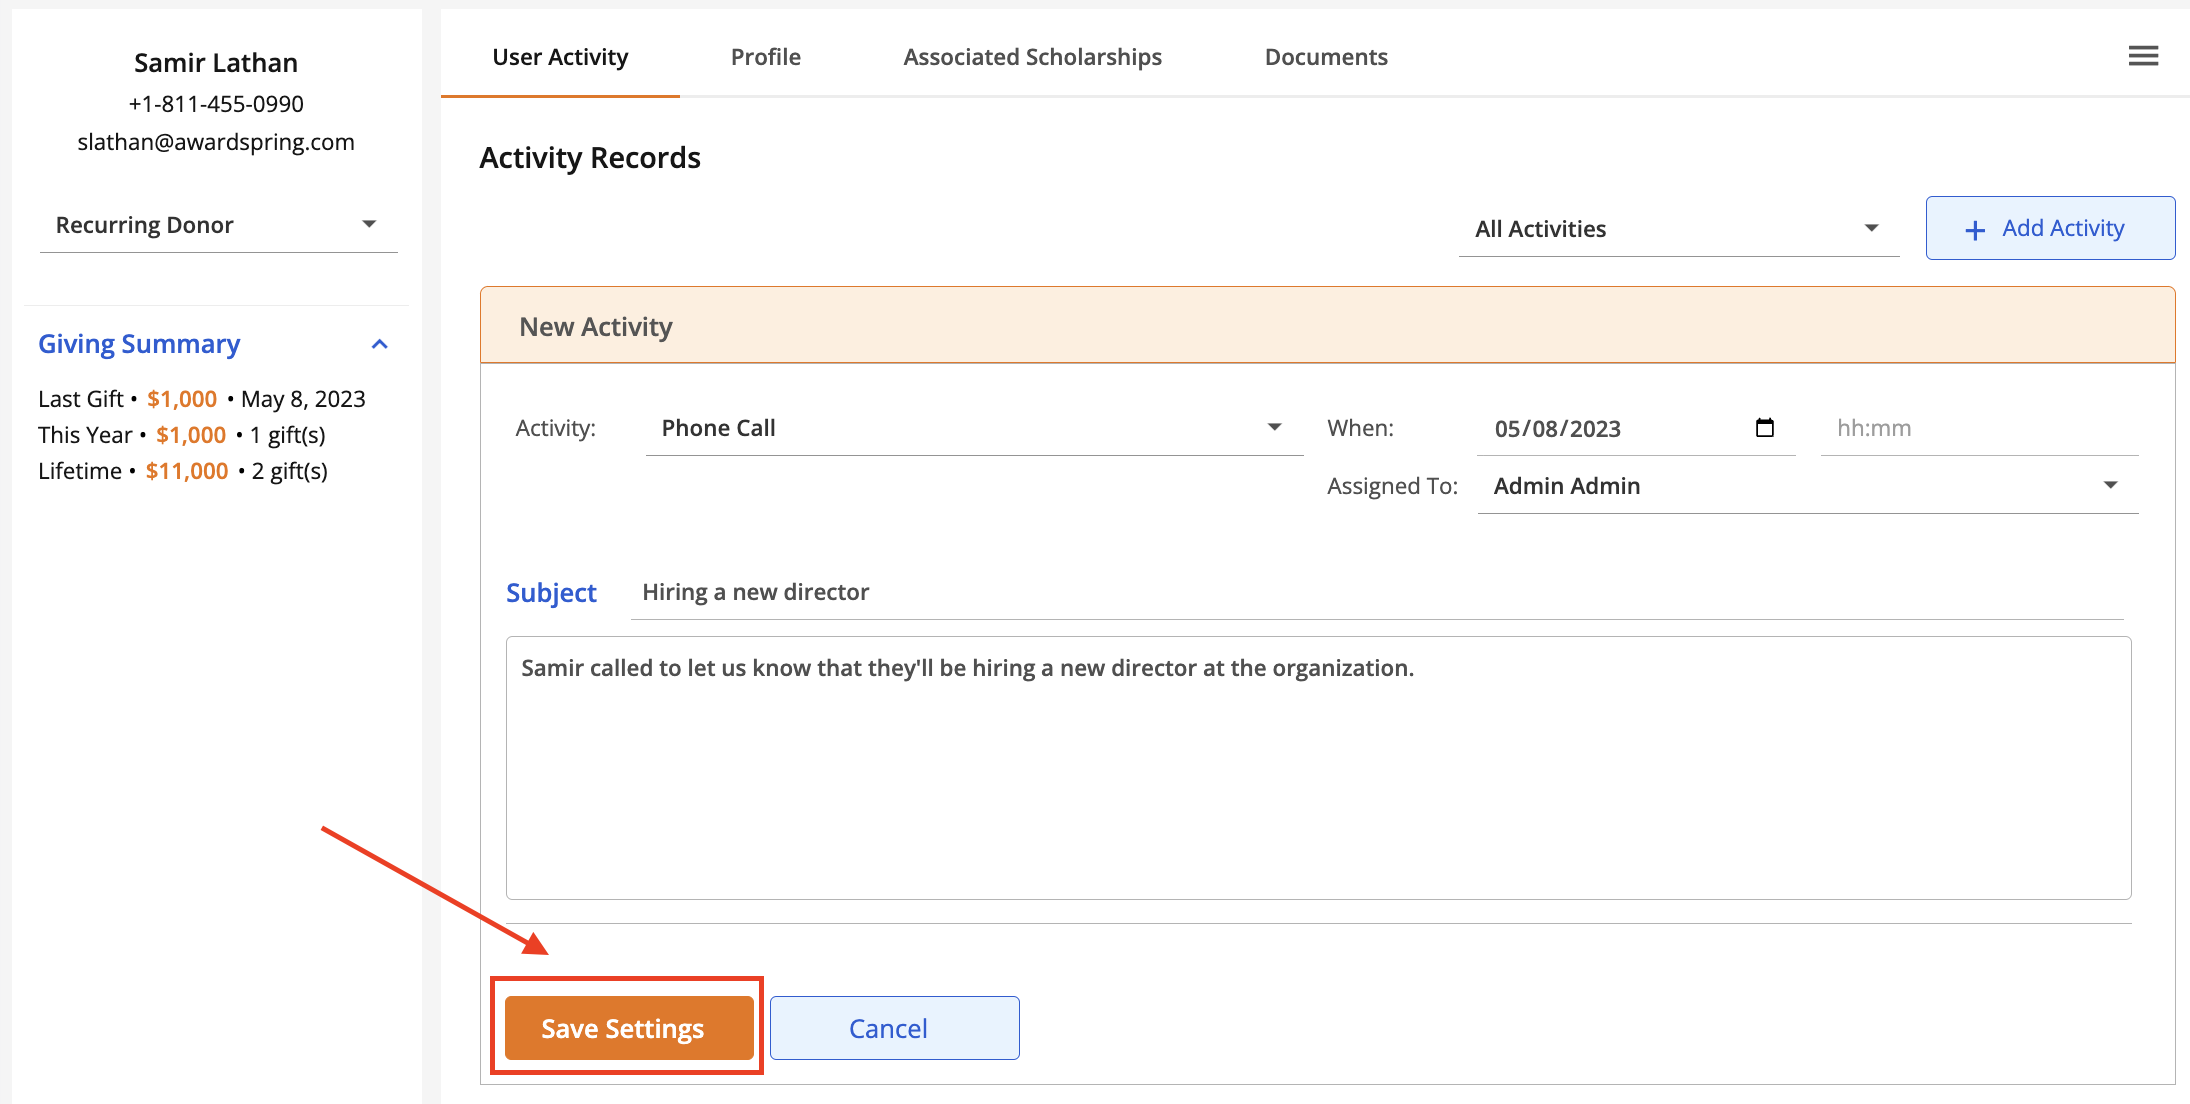
To update or make changes to an activity, simply click the arrow to expand it and make the appropriate changes. Your changes will be saved automatically.
To delete an activity, click the arrow to expand it and click the Delete button.