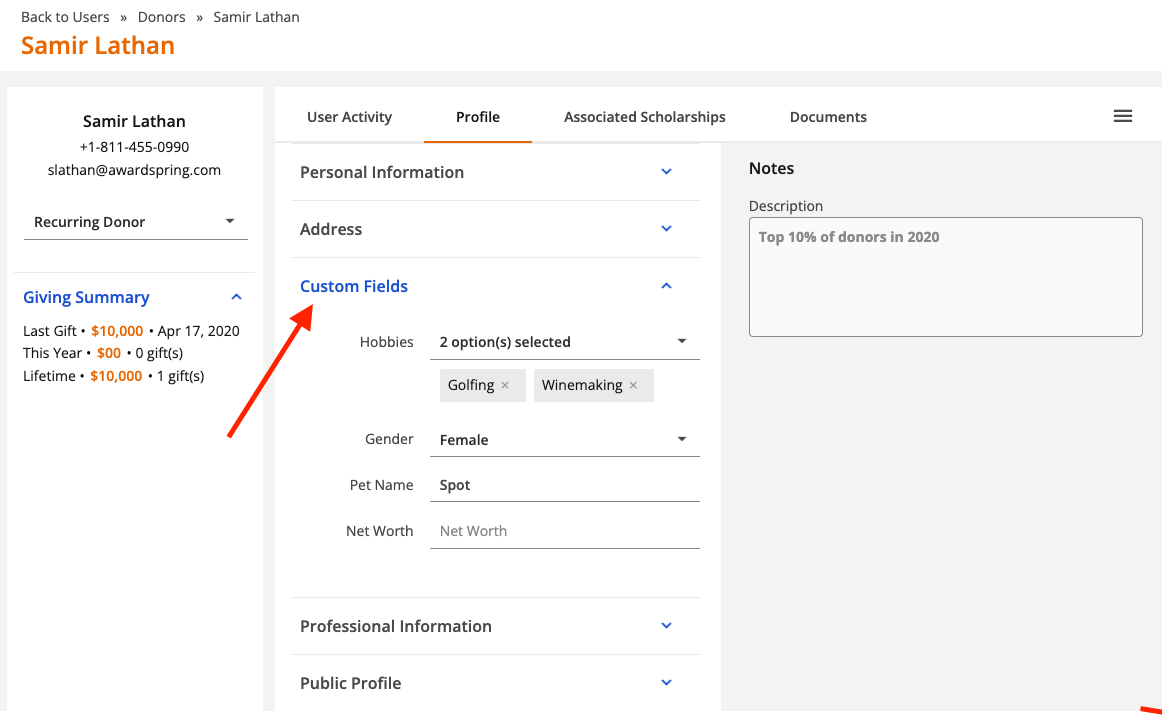
Create custom fields on the donor profile to track additional details that are important for managing your donor outreach. Once configured, custom fields will appear as part of the Profile tab on the donor record.
To create a custom field, click Settings and then Donor Profiles.
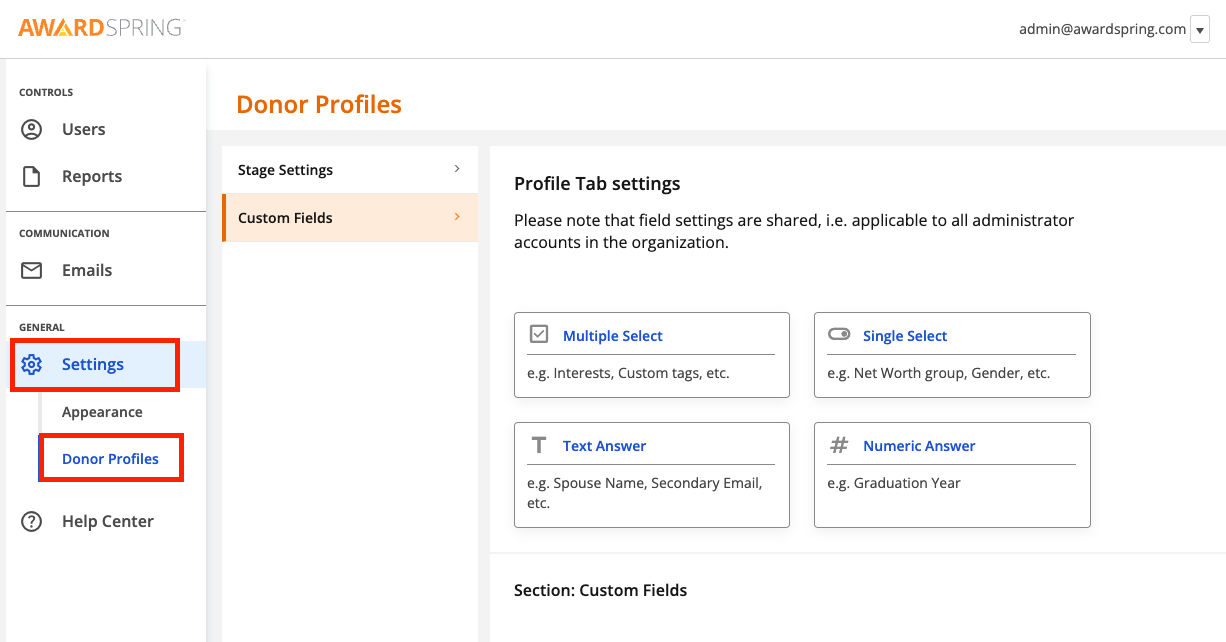
You can choose from different field types depending on what type of data you need to capture.
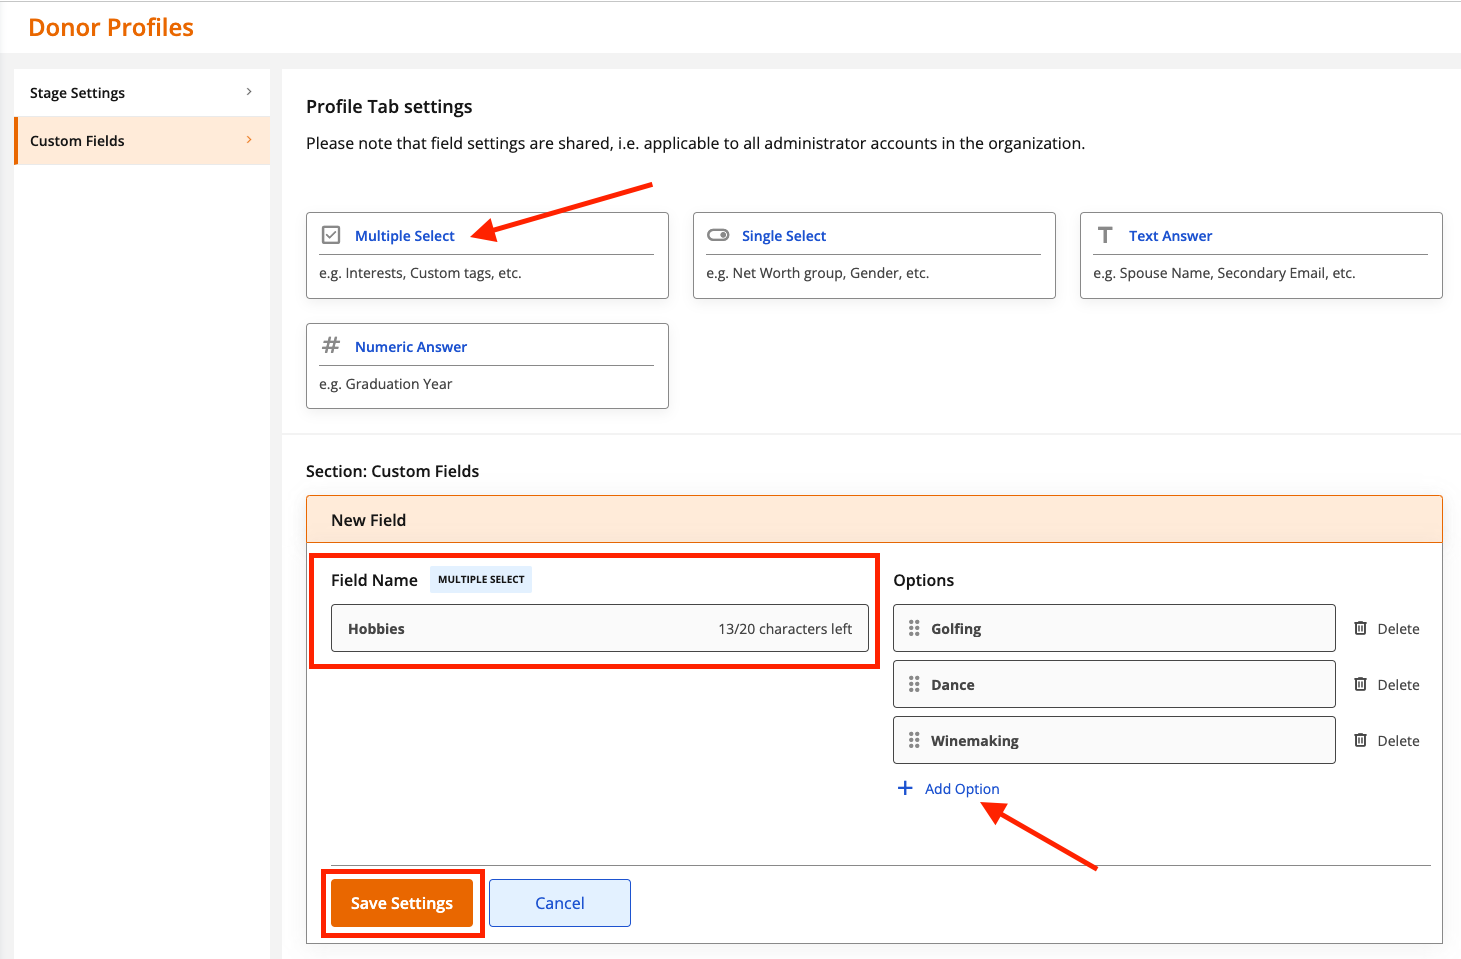
A Multiple Select field allows you to select more than one option from a list. This field type might be used for capturing a donor's interests/hobbies or for using custom tags. To create a multiple select field, click on the Multiple Select option, then enter a name for the field. Add answer options by clicking 'Add Option'. Click Save Settings when you're done.
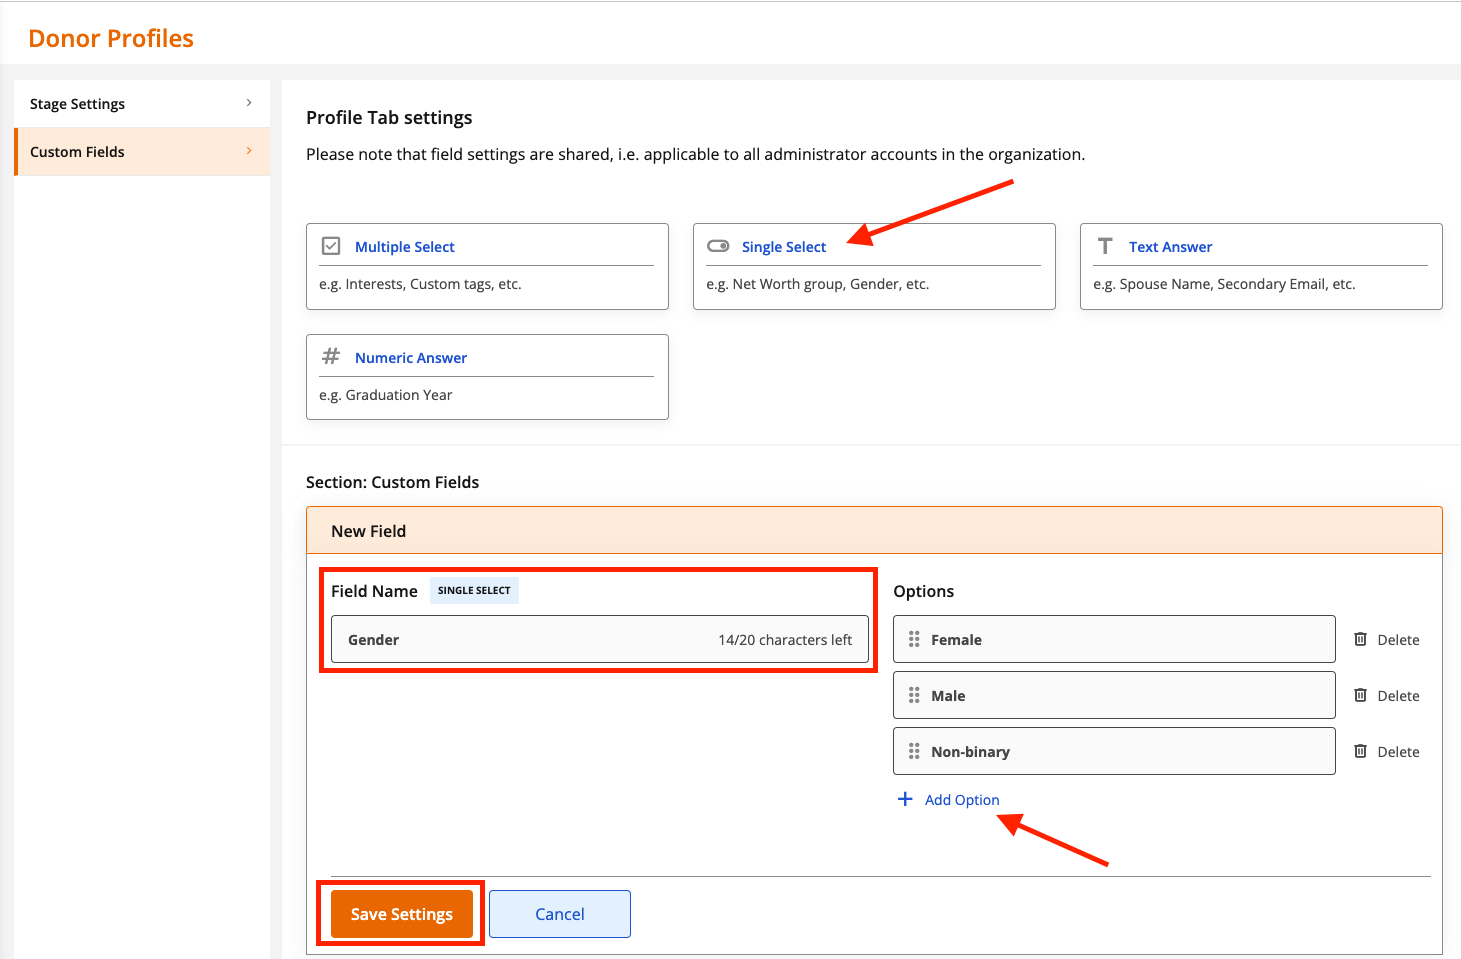
A Single Select field allows you to select a single option from a list. You might use this field to capture information such as the donor's gender, marital status, etc. To create a single select field, click on the Single Select option, then enter a name for the field. Add answer options by clicking 'Add Option'. Click Save Settings when you're done.
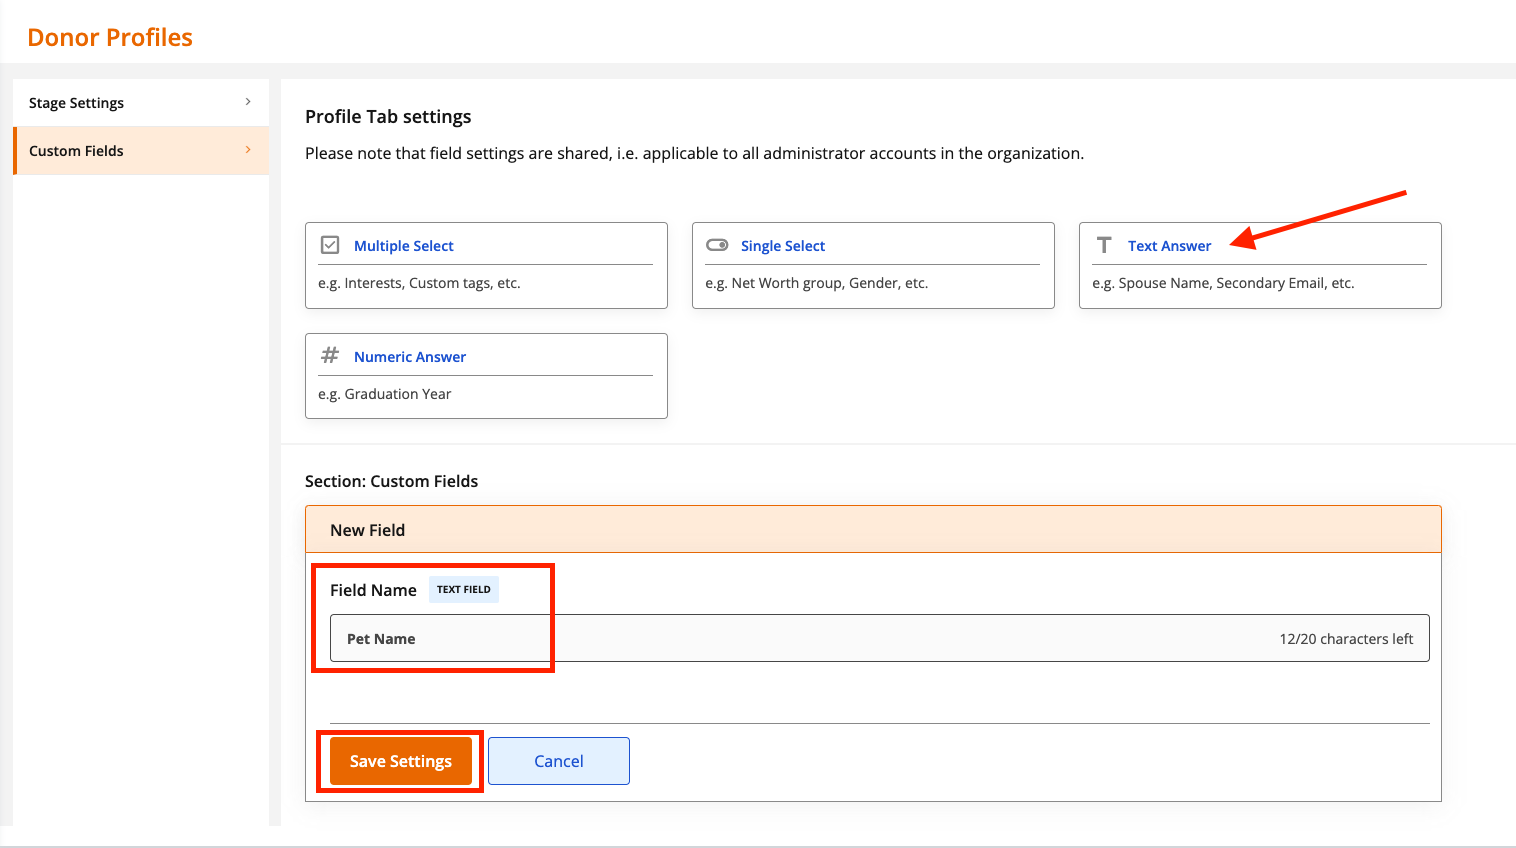
A Text Answer field allows you to enter free text into a box. You might use this field type to track information such as the donor's spouse, pet name, alternate email address, etc. To create a text answer field, click on the Text Answer option, then enter a name for the field. Click Save Settings when you're done.
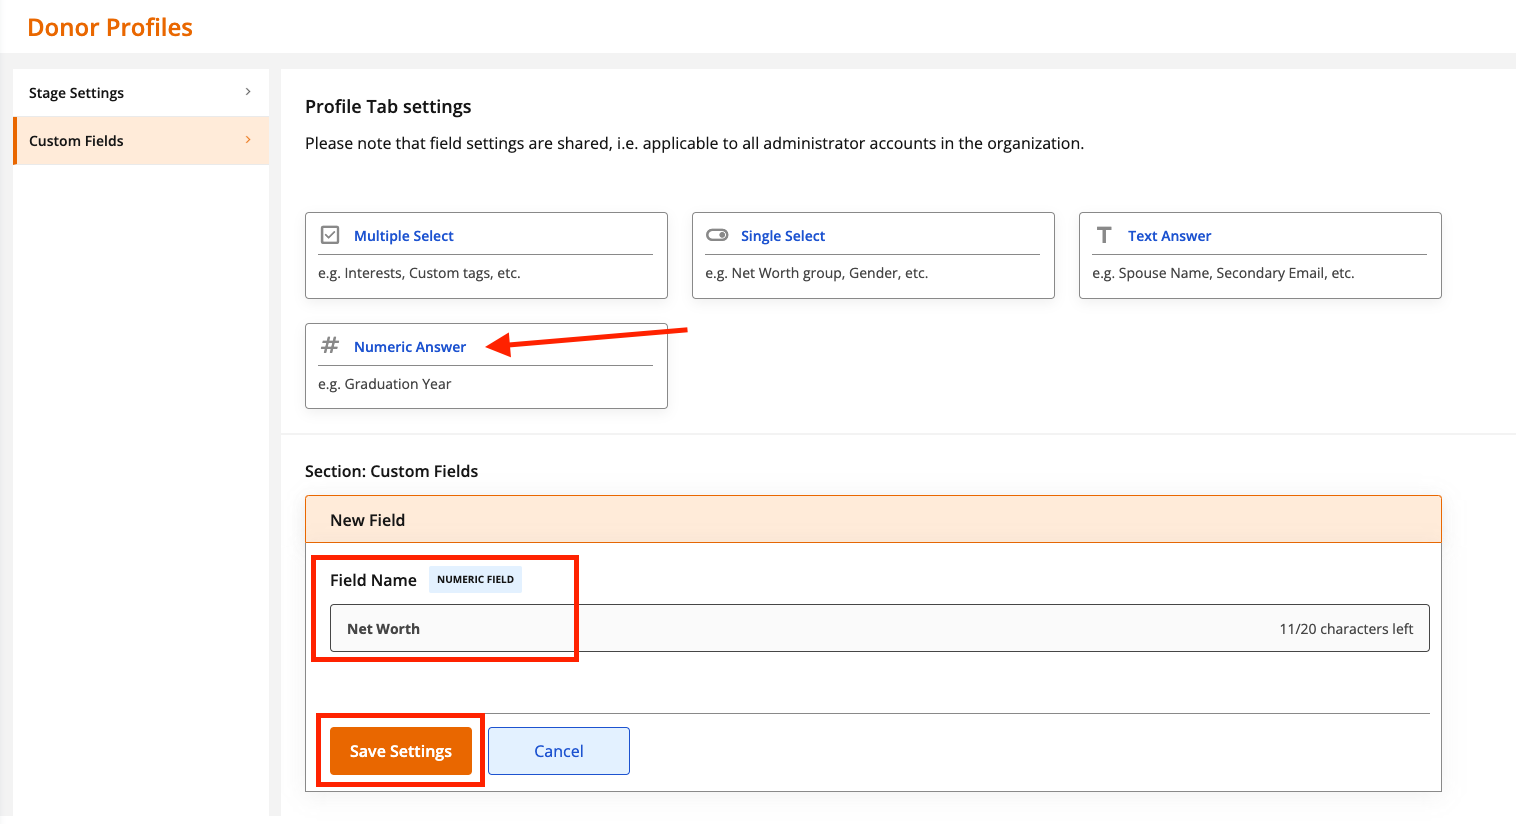
A Numeric Answer field allows you to enter numeric data. You might use this field to track things like a donor's net worth. To create a numeric answer field, click on the Numeric Answer option, then enter a name for the field. Click Save Settings when you're done.
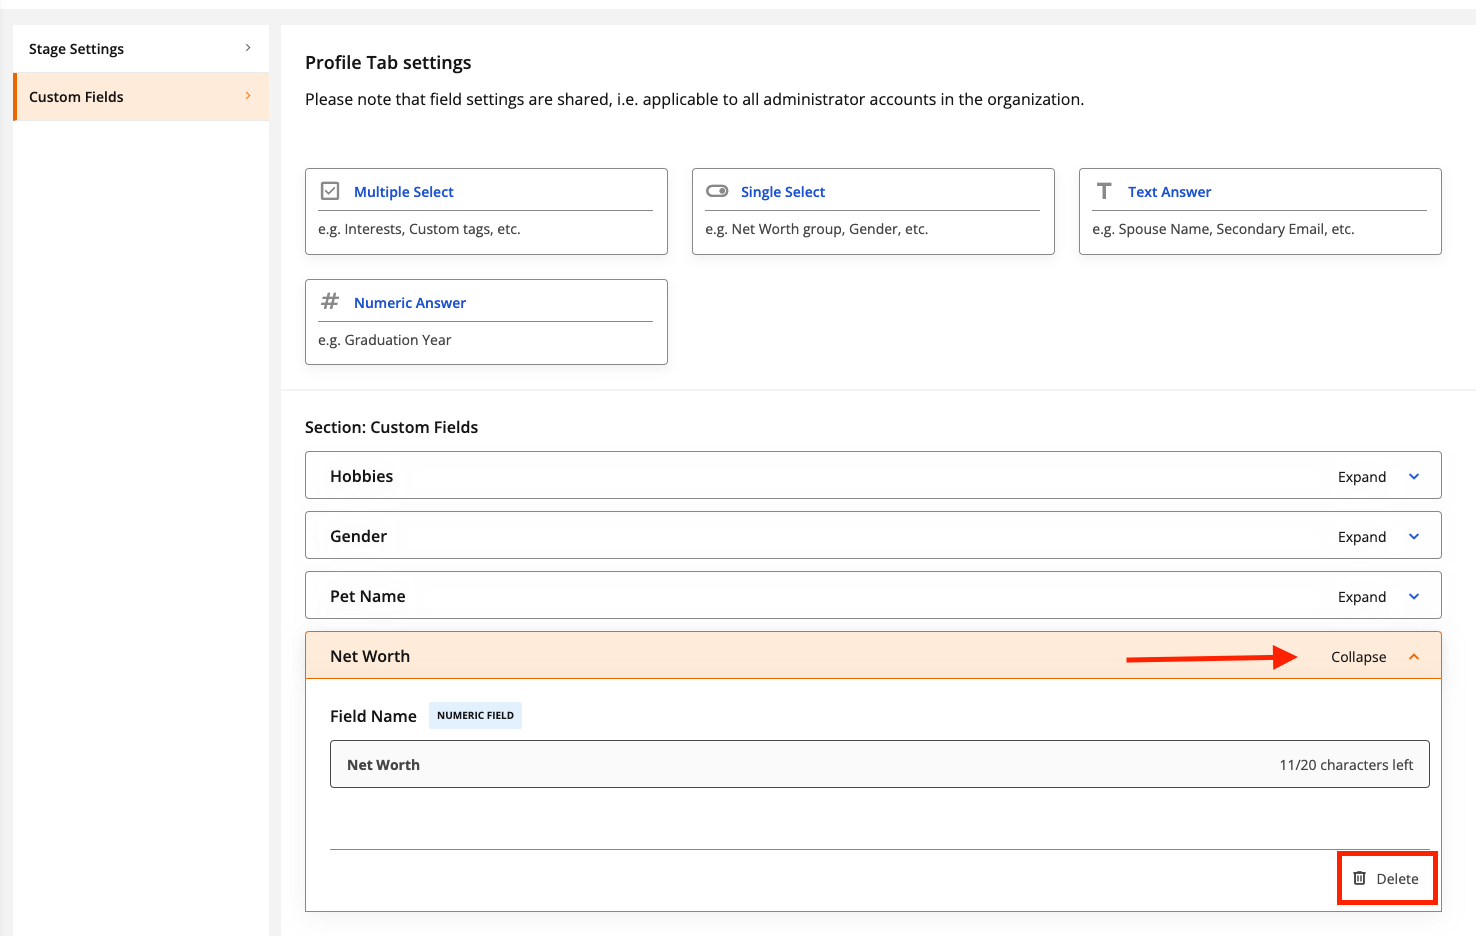
Deleting a Custom Field
To delete a custom field, click on the field name to expand it, then click Delete.