
Smart reports allows your team to create, save and download reports instantly. Administrators are able to choose the desired data points from their scholarships and students to create reports suited to their needs. Smart reports also allows you to email listed applicants directly from the report.
Getting Started
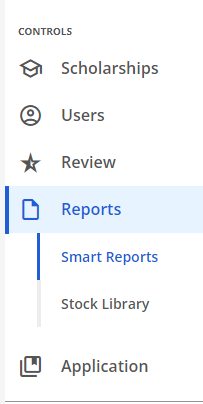
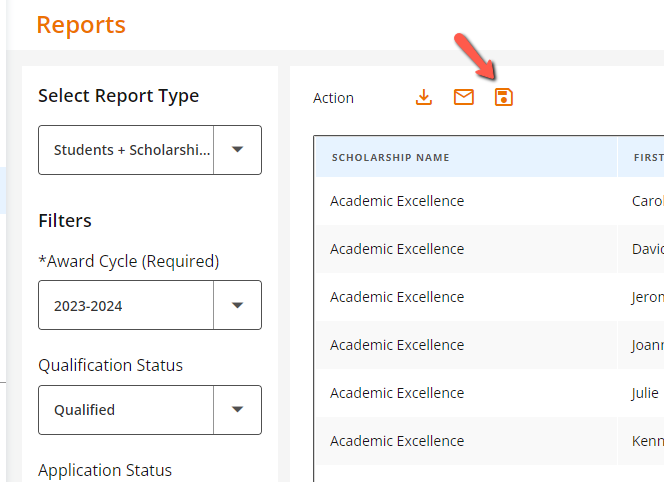
The Reports tab in the Controls section of the left navigation menu will default to Smart Reports where you can build your own reports.
The page contains two sections, the first has selection criteria and the second previews the data requested in the report.

Creating a Report
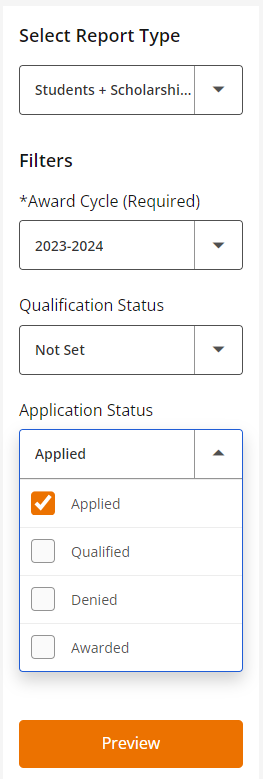
To begin creating a report, click the drop down arrow for "Select Report Type". Select Students + Scholarships (or an existing saved report). Select the desired award cycle from the Award Cycle drop down and Qualification and/or Application status options, if applicable. Then click on 'Preview'.
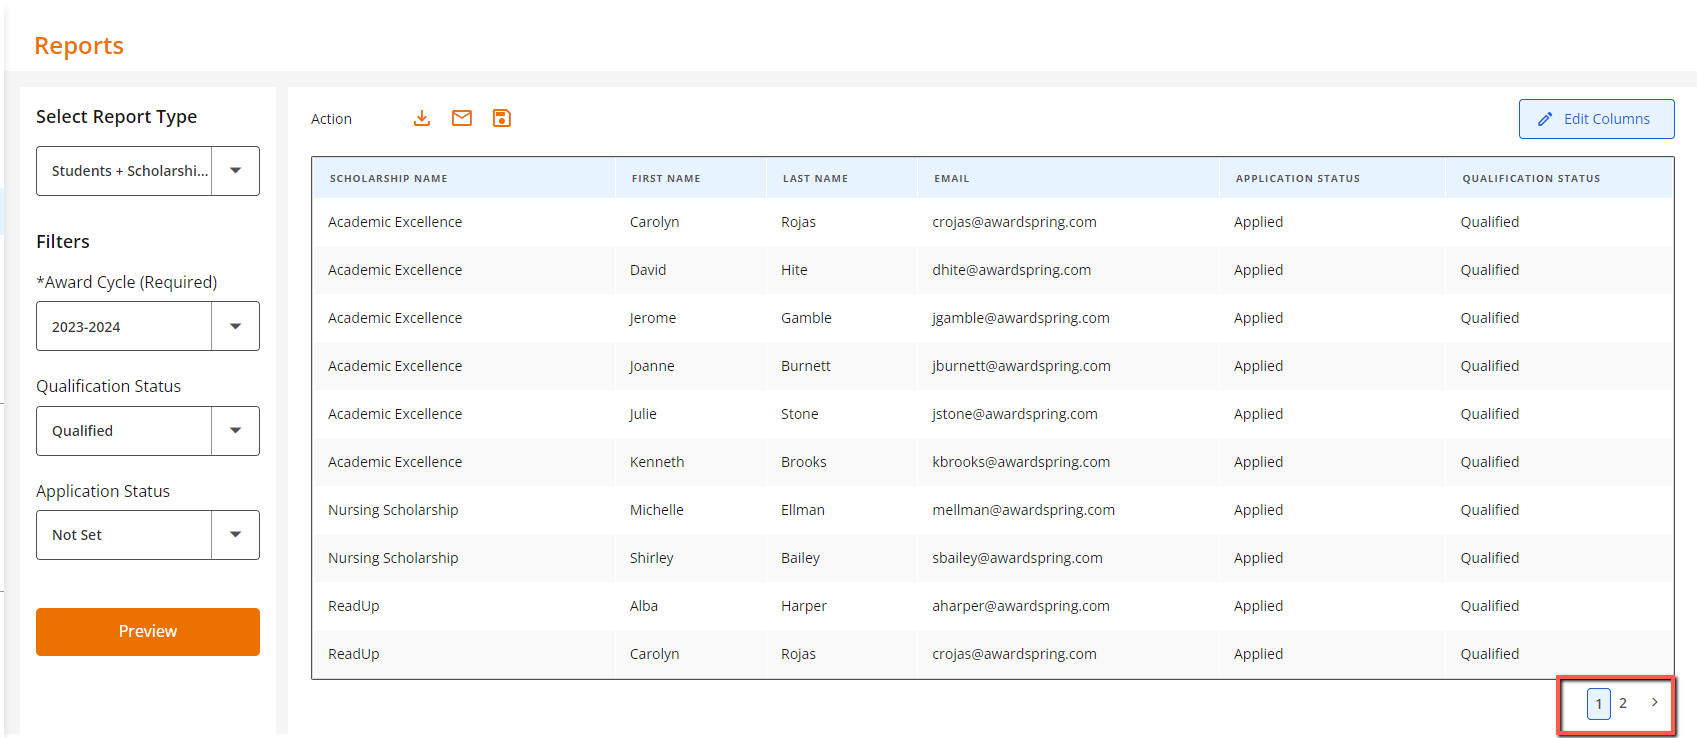
The data that meets the filter(s) selections, will be generated and displayed on the right side of the page.
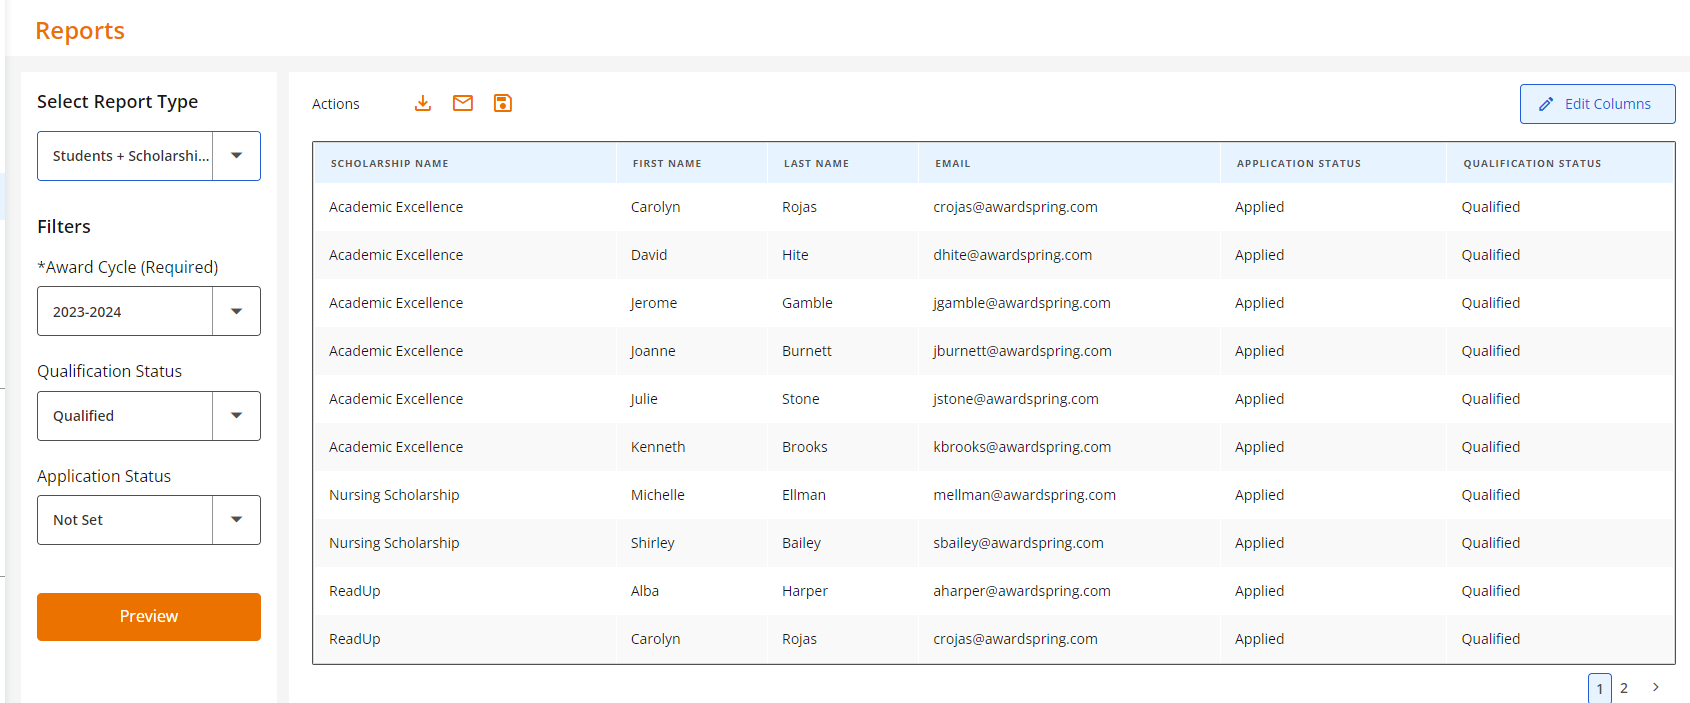
Once the preview is displayed, you can add more scholarship or student data by clicking on the 'Edit Columns' button in the upper right hand corner of the section.

A dialog box will appear where you can add data points that are specific to the student application, scholarships or to students at the scholarship level.
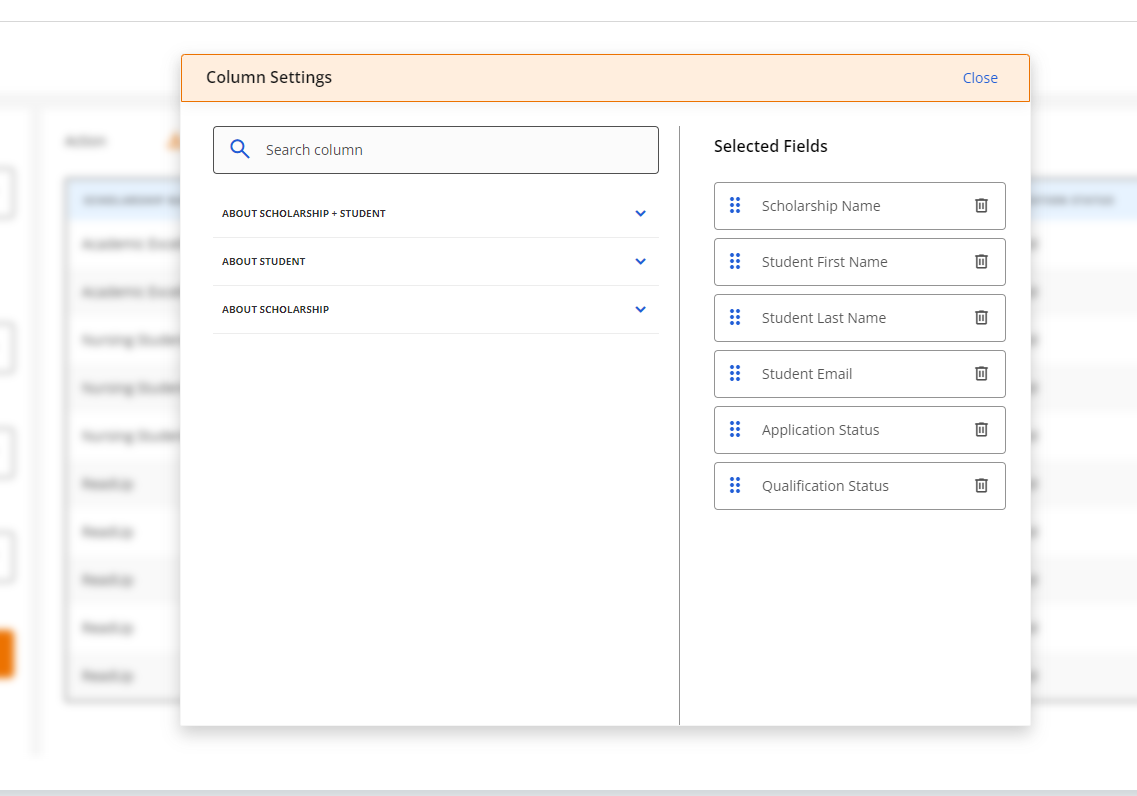
Expand the section that contains the data points you wish to add to your report and mark the ones to add to the selected fields. You can un-mark any fields you choose by accident or use the trashcan icon in the Selected Fields section to remove it from the selected fields to display.

To easily find a question on your application, you can type in a keyword or words in the search box at the top of the open dialog box.
Once you've selected your data points, you are able to drag and drop your selected fields to appear in the appropriate order.
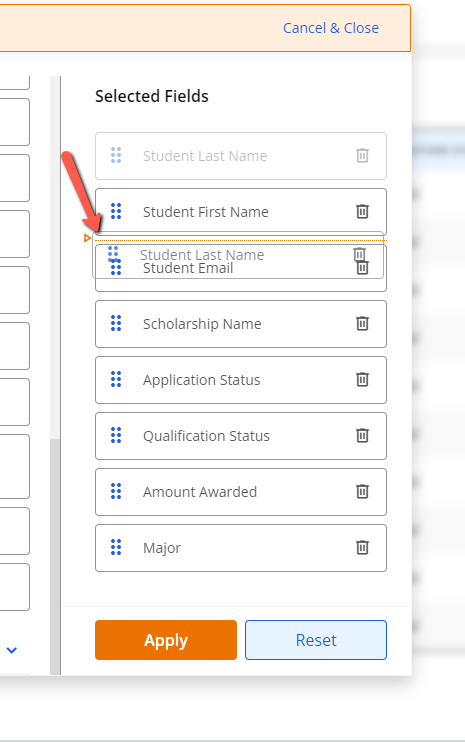
Click on 'Apply' to save these changes and go back to the preview screen or click on 'Reset' to re-start the data point selection process. If you decide not to add any columns, you can click on 'Cancel & Close' in the top of the dialog box.
Updated results will display for review. NOTE: Depending on the number of results, they may be displayed across multiple pages you can navigate in the lower right corner of the report.
When you have the report the way you need it, you can either download it or save it for future use.
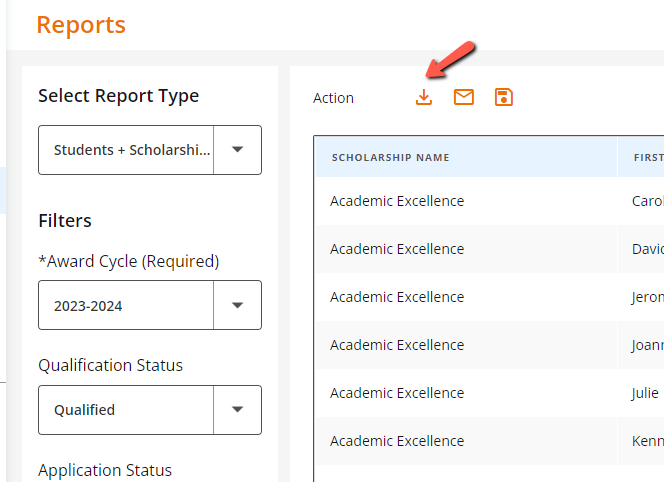
Reports that need to be downloaded and/or shared with a team, can be done by clicking the download icon in the upper left corner of the report preview view.
Reports will download into the stock library. You will be prompted to view the library or remain on the preview screen when you request the report. You will receive an email when the report is complete and ready for you to save locally or open as a .csv Excel file.
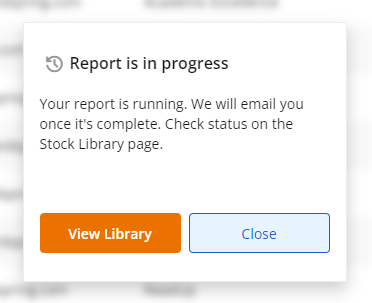
If you choose to remain on the report preview when downloading your report, you can use the left navigation menu to click on the Stock Library subtab under the Reports tab when you're ready to view the completed report.
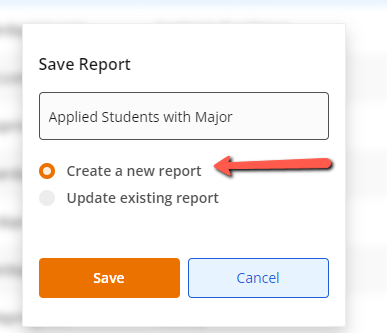
Reports that will be used in the future can also be saved for access at your convenience by clicking the disk icon in the upper left corner of the preview screen.
Clicking the save icon will generate a dialog box to name your report. Title the report and ensure 'Create a new report' is selected to save a new report and click on 'Save'
These reports will be found in the Smart Reports 'Select Report Type' menu when you need them again. Navigate to the Reports tab in the left nav menu and click on the 'Select Report Type' dropdown.
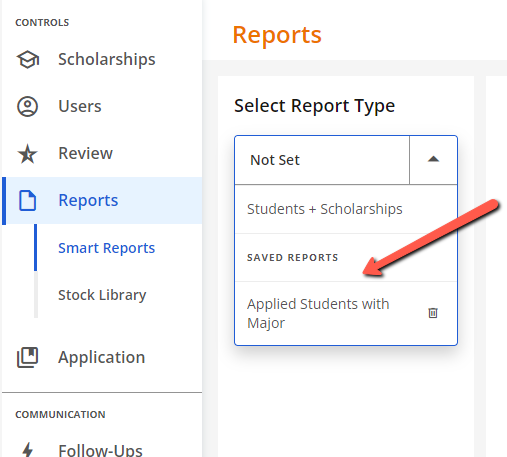
Select the saved reports from the Saved Reports section of the drop down menu. The report will display in the report preview screen. You can edit the report to add/remove columns, re-order columns or select a new award cycle to view the report for.
Admins are now able to email users directly from the Smart Reports tab. Select the desired filters and columns for your Smart Report to display a the set of desired users. Once the report is ready, click on the email icon.

Confirm that you wish to navigate to the Emails/Compose screen to compose and send your email.
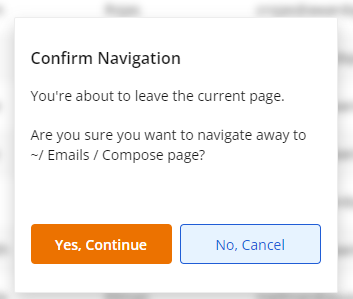
Admin will be re-directed to the Emails > Compose tab and user emails will autopopulate in the "To" field.
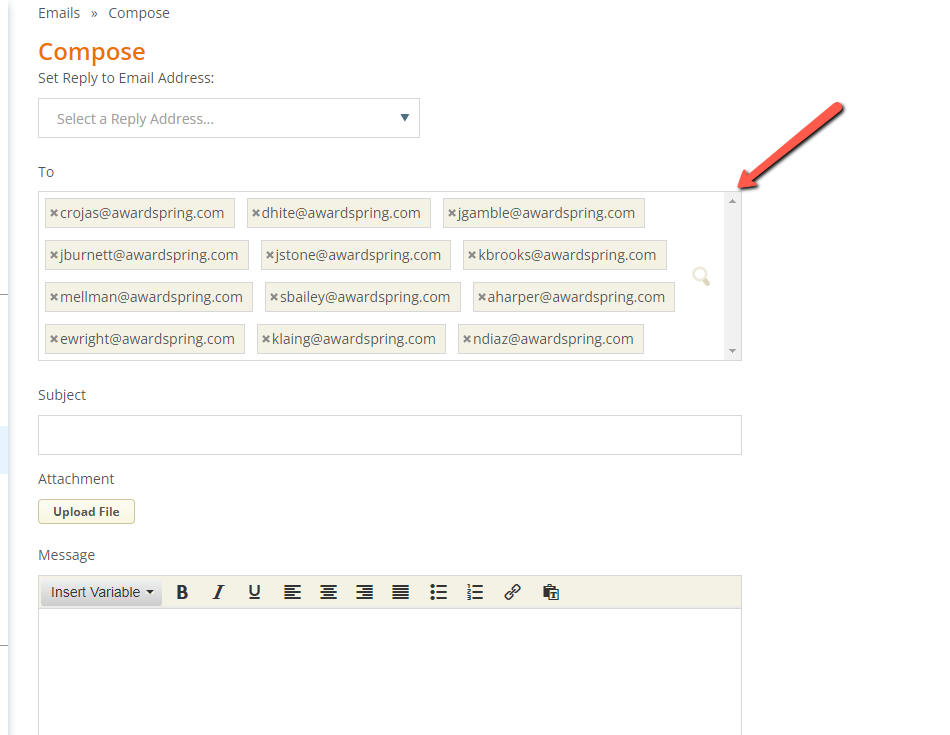
Compose and send email, as usual. Duplicate addresses are removed automatically, so each user will receive a single message.